What can be dried in the microwave? How to properly dry greens, herbs, fruits, vegetables in the air and in the microwave. How to dry herbs, vegetables and mushrooms in the oven and microwave
In the summer, fruits, berries and herbs are cheaper; many people have their own dachas and vegetable gardens, so housewives strive in different ways to preserve their harvest for the winter. There are several ways, but the most convenient way is to dry the workpieces using a microwave oven.
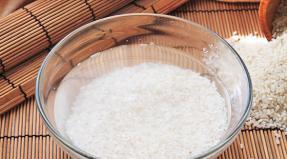
This process is simple and not too labor-intensive. Suitable for different berries: raspberries, strawberries, blueberries, black and red currants, bird cherry and rowan. Initially, they need to be washed very well, dried to remove excess water, and then you can begin the main drying. To do this, you need to place them evenly on the microwave plate and turn it on at 200 W.
Drying will only take a few minutes, after which you need to check if they are dry. If not, you can turn the berries over and put them in the microwave for a few more minutes.
You can also dry any fruits you have. They must be processed before drying. To do this, wash thoroughly, dry and remove, if necessary, the core. Then cut into slices or cubes and start drying in the microwave. The power is set to the same - 200 W. The drying period depends on the size of the chopped fruit.
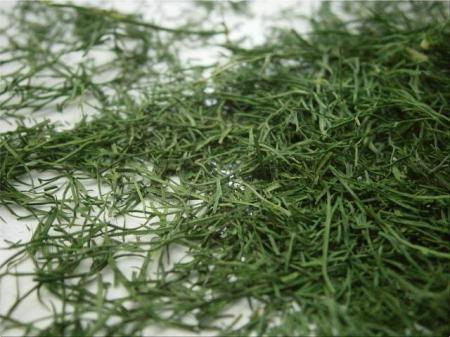
Usually three minutes is enough, but if necessary, you can increase the time. Using a microwave oven, many housewives dry herbs, which, with this type of heat treatment, completely retain their beneficial properties. It can be dried either in twigs or finely chopped.
Before drying, the greens must be washed and slightly dried. Only then can it be placed in the microwave. For finely chopped greens, a microwave oven power of 180 W and two to three minutes is sufficient. But for drying greenery with twigs, it is better to add another 20 W of power and increase the amount of time to three to four minutes.
You can dry berries, herbs and fruits using a microwave oven at any time of the year. This is very convenient, since it is very difficult to dry workpieces for the winter without it. You can also dry preparations for the winter using a conventional oven, which is similar in drying technology to using a microwave oven.
When choosing a microwave oven for preparing preparations for the winter, you can be sure that they retain all the necessary vitamins and nutrients, which you simply cannot do without during the period of vitamin deficiency.
There is no doubt that their presence in the daily diet helps due to the large amount of fiber in the blood and helps get rid of excess weight problems. In addition, they contain a large number of microelements and are a real storehouse of vitamins such as C, A, B9 and K.
The great popularity of the fruit has been due to the fact that it contains practically no allergens, and with a calorie content of less than 50 kcal per 100 grams of product, it can be consumed even on a strict diet. It is not surprising that breeders have developed many varieties of apple trees that can grow in a wide variety of climatic conditions.
Excellent taste, beneficial properties and availability have allowed apples to take their rightful place in the diet of many people. In this regard, a large number of culinary recipes using them, as well as ways to store this perishable fruit, have appeared. As for winter supplies, housewives prefer to cook compotes and jam. But if we are talking about not only preserving, but also increasing useful qualities, then drying apples is best suited for this.

In the microwave, this process will take very little time. And you certainly won’t have to, as before, string them on a thread and languish in a long wait. This method, due to the fact that the drying time of apples is reduced to a minimum, allows for the most efficient preservation of vitamins and microelements and increases the nutritional value of the final product due to
Recipe
Drying apples in the microwave is carried out in several stages:
- the ripest fruits are selected;
- they are washed and dried with a clean towel;
- the core is cut out and the apples are cut into rings, the thickness of which should be approximately 0.5 to 1 centimeter;
- the rings are placed in 1-2 layers on a large plate, which is best covered with a linen or cotton towel;
- if it is possible to adjust the power, then you need to set the value to 200 W, then turn on the microwave for 2.5 minutes.
As you can see, there is nothing complicated in the process itself, and drying apples in the microwave does not require supernatural efforts. But here, as everywhere else, there are some subtleties. For example, the drying temperature for apples varies somewhat depending on their variety and ripeness. This means the fruit may require additional time in the microwave, up to 4 minutes. Thus, the readiness of the apples is checked visually after 2.5 minutes, after which, if they are not completely dried, they must be returned to the oven for another 1.5 minutes.

For those who want their apples to be golden, we recommend soaking them for a few minutes in an ascorbic acid solution before placing them in the microwave. In addition to their beautiful appearance, this will give them additional sourness and enrich them even more with vitamin C.
Conclusion
Thus, drying apples in the microwave allows you to pamper the whole family with a vitamin-rich treat at any time of the year without wasting time and effort. As for storing the final product, it is better to choose a dry, dark place, and place the apples themselves in a fabric bag or in a jar with several holes in the lid for air circulation.
Already in the summer, a thrifty housewife thinks about what she will feed her family in the winter, when prices for fruits, vegetables and herbs “bite.” During the harvest, there is intense work - everyone is preparing compotes, juices, jams, canned goods, but the simplest and cheapest preservation option is drying.
The main advantage of such storage of products is the preservation of all nutrients and vitamins, flavonoids, and microelements. Fiber (pectins) improves digestion, microelements improve health and stimulate brain activity.
It is also important for the housewife that dried products take up little space. We will learn more about how to properly dry apples in the microwave for the winter, as well as prepare mushrooms and herbs, medicinal and aromatic herbs.
How to dry apples in the microwave at home
Rules for preparing apples:
- To prepare dried apples, it is advisable to take winter sour varieties. If you still dry the summer harvest, it is better with the skin, but the quality of the harvest will be lower;
- the fruits must be selected undamaged and without worms;
- Wash and dry the apples thoroughly;
- cut the apples into small slices up to 5 mm, remove the core (for compote, you don’t have to remove it);
- It is recommended to soak the slices in salted water (20 grams of salt per liter of water) for 3-4 minutes. It will lighten dried apples, protect against insects and increase shelf life.
Important. It is better to dry apples from your garden with the peel, they contain many useful substances. And if you bought the fruit in a store, it is better to do without the peel.

Let's look at the step-by-step process - how to dry apples in the microwave for the winter:
- Place the apple slices on a plate covered with a cotton cloth in a thin layer;
- put in the microwave, dry at 200 watts for 1 minute. The drying time depends on the size and juiciness of the pieces;
- remove the plate, turn the slices over to the other side and dry again at the same power for 1-2 minutes;
- every half a minute check the condition of the apples, if after turning them off they are damp, turn them on again for 20 - 30 seconds;
- When the slices are ready, the skin will become dull and the flesh will not stick to your hands. The slices will become creamy and soft to the touch;
- Remove the pieces from the oven and dry them further in the open air by spreading a cloth towel on the table and laying out the slices in one layer.
It is better to store any dried fruits in a glass container or in a durable fabric bag in a cool, dry place.

Drying greens and herbs
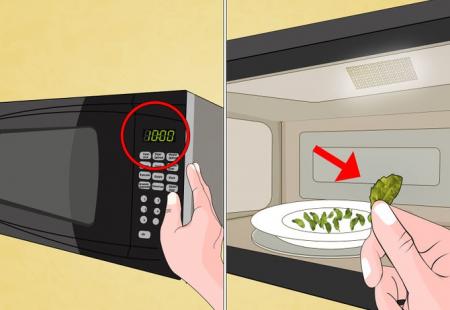
The microwave can handle the preparation of dried herbs and fragrant herbs, which add a special aroma and taste to dishes. And if the greens are grown in your own garden, then it will be the cheapest and most environmentally friendly product. Usually dill, parsley, basil, mint, celery, lemon balm and other plants are dried.
Important. To preserve the natural aroma and taste, drying herbs and herbs should be done as quickly as possible.
Step-by-step instructions for drying dill in the microwave:
- Wash the branches without stems and place in a colander;
- chop finely, place on a paper or cotton towel in a thin layer;
- cover with the same towel on top so that the greens do not burn;
- put a plate of greens in the microwave, press a weight on top, for example, put a glass of water;
- dry for 3 minutes at a power of about 800 W;
- Periodically (every 30 seconds) check the degree of readiness; you can extend the process by 10 - 20 seconds if the greens are damp.
Store herbs in a cool, dark room in airtight bags; shelf life is one year.

Important. Well-dried leaves turn pale, become dry and brittle.
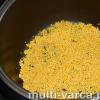
Drying mushrooms in the microwave
Dry mushrooms are a good help for the housewife in winter; you can diversify the menu and save money. Is it possible to dry mushrooms in the microwave, and what types, they contain a lot of moisture, can a microwave oven handle it? We'll tell you how to effectively prepare dried mushrooms.
It is advisable to dry tubular and marsupial types of mushrooms (porcini, boletus, boletus, morels, truffles), while lamellar ones do not taste bitter and dry well honey mushrooms and champignons.
Preparation process:
- mushrooms must be selected that are dense, whole, and without rot;
- There is no need to wash them, they will absorb a lot of moisture and will not dry out for a long time. Thoroughly clean the mushrooms with a brush and wipe with a damp cloth;
- for noble mushrooms, the caps are cut into slices, the stems into 2 cm slices, for chanterelles, honey mushrooms, butter mushrooms, only the caps are taken and cut into 1 cm slices;
- It is advisable to dry (wither) the mushrooms before the main drying in the microwave; this can be done in any room or in the sun. If they are not dried, they may release juice in the oven.

How to dry mushrooms in the microwave:
- place the chopped mushrooms on a wire rack, dish, tray, spreading a cloth napkin or towel;
- Place in the microwave for 15 minutes at minimum mode 100 - 180 W. The duration of processing may vary, it all depends on the thickness and moisture content of the slices;
- remove the dish, drain the accumulated liquid, ventilate the oven for 5 - 10 minutes from moisture;
- do a second drying, then a second airing, and so on several times;
- After drying, place the mushrooms on a table in the open air and leave for half an hour.
Important. After each cycle, you need to check the mushrooms. If they quickly break and crumble, it means they are too dry. Properly dried mushrooms should be flexible and not break immediately.
Mushrooms should be stored in glass containers or in durable moisture-proof bags in a dry place with good ventilation. The best, but expensive option is a vacuum container.
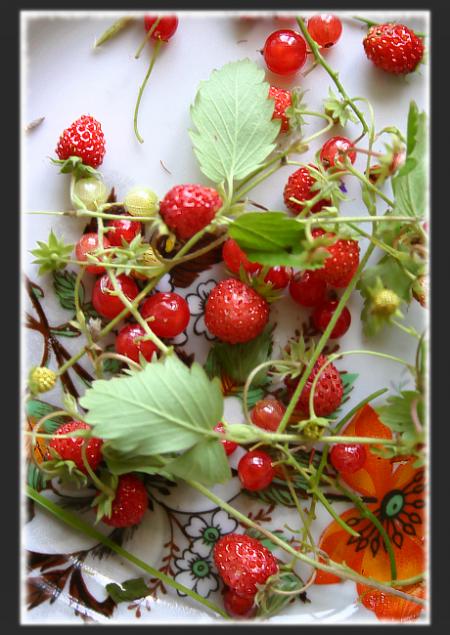
Drying berries
You can also dry berries in the microwave, as they are much healthier than in the form of jam. It is better to dry large berries - strawberries, grapes, cherries. For aromatic tea and compote, currants and raspberries (slightly unripe) are dried; you can also prepare rowan berries, blueberries, and chokeberries. Dried berries retain all the beneficial substances, and chokeberry (aka chokeberry) becomes less tart. The berries are selected whole, firm, and collected in warm, sunny weather.

Berries are dried almost the same way as greens:
- lay out on a tray or dish covered with a paper towel in small portions;
- cover the top with the same towel;
- the power is set to 200 W, the drying time is 3 – 5 minutes, since there is more moisture in the berries;
- It is necessary to dry in several stages, constantly checking the degree of readiness (every half a minute).
There are many options for using dry preparations, but first they need to be washed with running water and then soaked for several hours in cool water. Cooking will become easier, and the taste and aroma will be brighter.
22.10.2013 29.04.2016 by gotovlyu v mikrovolnovke
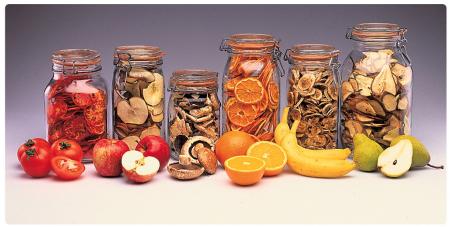
In addition to the basic and familiar ways of using a microwave oven (heating and cooking food, defrosting), there are several more interesting options for using it. For example, you can dry mushrooms, herbs, onions, garlic, carrots, bell peppers, dried apricots, apples, and prunes in a microwave oven.
Such microwave functions free you from the need to buy a special dryer for vegetables, especially if you don’t have a lot to dry. And also much faster compared to the “grandmother’s” method. And although such drying will not withstand industrial scale, small surpluses (probably happens to everyone when there is a little left and you don’t know where to put it) will always be processed by a thrifty housewife and then put into use.
Drying mushrooms in the microwave
First, let's figure out how to dry mushrooms in the microwave. If you have collected (no matter where in the forest or at the market) porcini mushrooms and want to dry them, just like others, then keep in mind that you do not need to wash them, otherwise there will be too much moisture, the mushrooms will cook and not dry.
Clean very thoroughly and dry with a damp cloth. Cut into small, preferably the same size, pieces. Place on a wire rack. You can, of course, use a plate, but a wire rack is better. If you dry mushrooms on a plate, cover it with a paper napkin.
Place the mushrooms in the microwave, turn on the minimum (100-150 W) mode and set it for 20 minutes. The drying time depends on the thickness of the pieces and the moisture content of the mushrooms; if you think that 20 minutes is too much for your mushrooms, set it less. After the time has expired, open and ventilate the oven to remove accumulated moisture for 5-10 minutes. Repeat heating and opening 2-3 more times.
Yes, drying mushrooms in the microwave is a troublesome process and is suitable in two cases: few mushrooms or a large microwave. But, you can speed up the process... if you change the grates or plates - while one is heating, the second is drying in the air, but it should not be too humid in the oven itself (if it is wet and dripping from it, then you must ventilate it).
For those who have a “grill” mode, I offer this option for drying mushrooms: place a wire rack with pieces of mushrooms laid out and turn on the “grill” mode for 5-9 minutes; ventilate for 5-10 minutes; repeat a few more times until the mushrooms are dry (4-5 times).
In the microwave you can dry not only mushrooms, but, for example, garlic, whole cloves or finely chopped, and onions. To do this, you need to peel it, place finely chopped or whole cloves on a paper napkin. Cover the top with another napkin and place in the microwave along with a glass of water. Then dry until ready. That is, after the first three minutes of drying, check readiness every thirty seconds. Onions are dried in a similar way. The only thing that is recommended for drying onions is to take spicy varieties. Because when dried, the onion loses a little of its pungency.
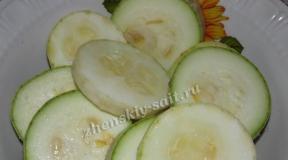
You can dry vegetables in a similar way. For example, carrots and bell peppers. Vegetables must be washed and cut into small cubes. Dry slightly on a towel, place between two paper napkins or towels. The following is similar to the previous two processes. Drying time for vegetables may take longer, so you need to check the readiness of the vegetables and make sure that the water in the glass does not boil away.
How to dry greens in the microwave
If you like to season your dishes with various herbs and spices, you can make preparations for the winter that will cost much less than buying them in the winter.
How and what kind of greens can be dried in the microwave? Dill, parsley, green onions, basil and others are suitable. First, prepare: wash, trim the roots and dry a little on a towel or napkin. It should be noted that dill does not need to be dried before chopping. It will be enough to rinse it and shake off excess water.
Then finely chop, place on a paper napkin, and cover with the second part or another napkin on top

and place in the microwave. Place a glass of water there to create additional load for the microwave.
You need to dry the greens for about three minutes at full power. Periodically, be sure to check the readiness of the greens and, if necessary, increase the time by thirty seconds. Since depending on the size of the portion, the drying time may vary slightly. It is advisable not to dry large quantities at once. It is better to do this in two batches, evenly placing the greens on a napkin, which will improve the quality of the process. Dried greens will become brittle and change color. This indicates that the drying process is complete.

You can also dry it with whole branches, but you will have to dry it in the air, since the leaves will dry out, but the branches will still be wet.

Drying mushrooms, herbs, vegetables and fruits in the microwave saves a lot of time and makes the process much easier. Due to the fact that the process takes a short period of time, the products retain a significant amount of nutrients that are so necessary for the body during the winter.
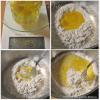
Today I will show you how easy and very fast dry flowers in the microwave. After the holidays, looking at fading flowers, I want to preserve this beauty so that I can then use the petals for filling with epoxy resin.
To dry flowers in the microwave you will need:
1. microwave oven,
2. plant petals,
3. two small tiles 10*10,

4. four elastic bands,

5. watercolor paper, cut 10*10 cm.

First, separate the petals from the flowers, choosing even and fresh ones. If there are drops of water on the petals, blot them with a paper towel or napkin.
Place two squares of watercolor paper on the front of one tile.

Then we place flower petals at a distance from each other on watercolor paper.
We proceed in the reverse order: we place two sheets of watercolor paper and a tile on the petals. When placing paper on top of the petals, make sure that there are no folds on the petals. There is no need to press the tiles tightly against each other.

Now we tie the resulting “sandwich” with elastic bands, as shown in the photo.

Place the tiles in the microwave without covering with the round microwave lid. I did not change the power level of the stove, I used the usual settings. I recommend testing it for the first time on a damaged petal to find out the optimal time and power specifically for your stove. Turn on the microwave for one minute. This time is optimal for thin and fleshy orchid petals.

If you turn on the oven for two to three minutes, the petals will fry and turn brown. This is from my own experience.
After one minute, do not rush to remove the tiles from the microwave - you can get burned! Remove the rubber bands and remove the tiles. It is very important to carefully separate the petals from the paper; they may stick to the paper if not all of the moisture has evaporated.
I separated the resulting petals and this is what happened.

If the petals turn out wet to the touch, then you need to repeat the whole process, making sure to change the sheets of watercolor paper and reduce the heating time to 30 seconds.
Personally, I turned on the microwave for a minute and a half and the petals were immediately dry and ready for pouring. Please note that heating times are indicated specifically for orchid petals. If you are going to dry thin petals, reduce the first heating time to 30 seconds.
The advantages of this method of drying flowers are obvious:
1. The petals dry out very quickly.
2. the color of the plants is preserved almost 100%.
3. Petals dried in this way can be filled with epoxy resin on the same day.
Updated 05/24/2018.
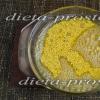
Photo before the start of the process. The tulip has already begun to fade and has already lost some of its water, so drying it will not be a problem.

The same petal after drying. The color has changed, but the quality is excellent.

I dried it as written above - 1 minute and then another 30 seconds. The only change is that I put a napkin between the watercolor paper and the tile for better water absorption. Now you can iron it without steam and fill it with epoxy resin. I need a dome, so I will use PEO-610.
Epoxy resin for pouring plants and jewelry can be purchased in our store.
If you have your own thoughts about this drying method, we are waiting for your comments.