Crafts using a glue gun: the best ideas, step-by-step instructions for making them. Unusual crafts with a glue gun What can be made from a hot glue gun
Nowadays there is a huge variety in the world of handicrafts, and crafts are made from various materials. Basically these are paper, bottles, plasticine and the like that are familiar to us. Most DIY projects require glue to hold them together, but in this article we will show you how to make crafts using hot glue using a hot glue gun. Such crafts look very beautiful and unusual, and most importantly, they are very simple to perform. Even children 5, 6, 7, 8 years old can cope with such work. This article provides several crafts with step-by-step instructions, as well as video master classes for a clearer description. So, let's see what can be done using regular hot melt glue.
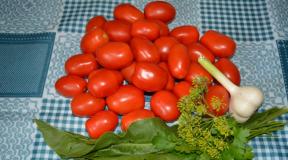
Original bowl for sweets
Making a vase will give you pleasure, because it is a creative process. You can put sweets in such a vase and decorate your holiday table with a handmade craft. To make a vase craft, see below for a full description with detailed instructions.
You will need:
- Hot glue gun
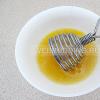
- Paint (preferably in a can)
- Glass bowl for base
Progress:
- Apply cream to the outside of the bowl so that the glue can be easily removed later.
- When the glue has warmed up, we begin to apply it to the bottom of the bowl in an even layer. This way we will have a stable bottom.
- Next, starting to move from the bottom of the bowl, apply the pattern with glue. The drawing can be anything you want, depending on your imagination.
- Leave until the glue dries completely.
- When everything has frozen, carefully remove the adhesive base, starting from the edges.
- When you have removed it, you get an almost finished basket, all that remains is to paint it with paints. In this way you can make not only a vase, but also other containers.
Video of a vase made of hot glue
Hot glue bracelet
You can make such a beautiful bracelet with your own hands very quickly and easily. This decoration will not leave anyone indifferent. We will tell you how to make such a craft with a full description of each step. 
You will need:
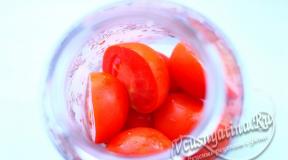
- Coca-Cola can
- Hot glue
- Bracelet Jewelry
Progress:
- Apply glue to the jar in horizontal stripes. The width of the bracelet will depend on the number of stripes.
- When the glue is completely dry, carefully remove it from the jar. This will be the base of the bracelet.
- You can glue various beads or appliqués onto this base, and you can also paint it.
Hot glue butterfly
A beautiful butterfly made from regular hot glue will be a good decoration for a flower pot. The craft is quite simple to do, so you can do it together with your child. Below is how to make a butterfly with your own hands. 
You will need:
- Hot glue
- Glass
- Thin wire
- Rhinestones
Progress:
- Apply cream to the glass so that it is easy to remove the glue afterwards.
- First, use glue to draw the outline of the wings on the glass, then fill the middle with a zigzag.
- In the same way we draw the body and antennae.
- When everything is dry, remove our blanks from the glass.
- Using glue, we assemble our butterfly, then attach it to the wire.
- You can decorate our butterfly with rhinestones or beads.
Decoration for the New Year “Snowflake”
A snowflake made from hot melt adhesive will be a wonderful decoration for your New Year's interior. Even a 4, 5, 6 year old child can handle this craft, because it is very easy to do. We will tell you how to make a beautiful and bright snowflake with your own hands with detailed instructions. 
You will need:
- Hot glue
- Stencil
- Glitter
- Parchment paper
Progress:
- Take a stencil and put parchment paper on top.
- Apply glue on top of the translucent pattern.
- Pour a little glitter onto a piece of paper and dip a still warm snowflake into it. Our bright and festive craft is ready.
Video snowflake for the new year
Convenient pencil case
Hot glue can be used to make not only decorations, but also useful items, such as a pencil case. No one at school will have such a pencil case, because it was made by hand. To get started with our craft, read the step-by-step instructions or video master class. 
You will need:
- Hot glue
- Lightning
- Wide aerosol can with paint
- Decorative butterflies
Progress:
- Lubricate the can with cream.
- We begin to apply glue from circles on the edges.
- We make two vertical stripes the width of the corresponding zipper.
- Then we continue to draw horizontal stripes in a circle (the arcs are approximately 1 cm apart from each other), without going onto the line for the lightning.
- On the horizontal stripes we draw a pattern similar to a herringbone or a zigzag.
- When everything is dry, take out the bottle and place the cap on the bottle on the sides one by one to apply the design.
- We apply the pattern with a fine mesh so that nothing falls out through the holes.
- When the entire structure has dried, insert the zipper, securing it with glue.
- We paint our pencil case with paint and glue butterflies for decoration. Now you can put whatever you want into it.
Video on how to make a pencil case with your own hands
Amazing roses
Beautiful roses will be a wonderful decoration for your interior, or you can use them as a gift to family and friends. To make it easy for you to understand how to make a rose craft with your own hands, we have made a detailed description of the craft with step-by-step instructions. 
You will need:
- Glue (can be any color)
- Glass
- Pencil
- Paper
- Putty knife
- Napkin
Progress:
- Draw a circle with a diameter of about 6 cm on a sheet of paper and place it on the glass.
- Now apply glue to the circle and level the surface with a spatula. Waiting for it to dry.
- Remove the circle from the glass and roll it into a beautiful tube.
- We attach the next petal in a more expanded form, and so we do petal by petal.
- We glue all the joints of the rose so that nothing sticks out, and apply a thin strip of glue to the outer part of the petals. This way the flower will look more voluminous.
- Such flowers can be glued to a wire wrapped in green paper.
- Our beautiful rose is ready.
Finally
You can also create a huge number of crafts from hot glue, it all depends on your imagination. Let this article prompt you to the creative process and serve the fruitful development of your creative abilities.
When a woman appears in the tool department and asks for a heat gun, it’s immediately clear: this is a purchase for needlework. A beautiful lady wants to create. It doesn’t matter what exactly - luxurious bouquets of flowers, elegant decorations using the kanzashi technique, or a simple craft made from pine cones for kindergarten. This will definitely be done with love and putting a piece of your soul into it. And in order not to make a mistake and make the right choice of a glue gun, as well as understand how to use it skillfully, it is worth knowing some details.
What is glued with a hot-melt gun?
The main function of the hot-melt gun is quick connection with hot glue. Final hardening occurs within 5 minutes, and not after 24 hours, as with most analogues in tubes. Compared to instantaneous, the probability of “making friends” with your fingers is reduced to zero. You can glue almost any natural and synthetic materials:
- tree;
- metal;
- stone;
- cardboard;
- glass;
- ceramics;
- cork;
- skin;
- plastic.
How does this miracle work? The gun contains a thermal heater. A round glue stick - a rod - touches it through the feeding device. Another name is cartridge: after all, it is with them that pistols are loaded. When the device is plugged into a 220 W network, a temperature of 105 o –210 o C is created in the thermal heater. The glue melts and flows through the nozzle when the trigger is pressed.
Components of a hot glue gun
What are the differences between glue sticks?
The rods come in different colors. It’s not always just pretty - they have differences in chemical composition and melting point. The color determines which material the adhesive is best suited for:
- transparent - glass, fabric, PVC plastic, metal, cable, electrical equipment, any types of paper. Ideal for handicrafts;
- white - tiles, ceramics, plastic, cable;
- black - leather and carpeting;
- yellow - wood, cardboard, paper, finishing materials.
Glue sticks for hot glue guns come in different colors depending on their melting temperature
Table: color relationship between glue stick and material
Pink, blue, green, red are produced in the form of assorted sets of 10–12 pieces and are intended for needlework. Craftswomen use them when they want to hide marks on the working material as much as possible or for crafts using the papier-mâché technique. Less commonly, they are used for gluing stamps and making seals.
But the rods, which are intended specifically for decoration, may contain interesting fillings, for example, shiny elements.
Hot-melt adhesive rods for decoration are filled with shiny elements
Round rods vary in size. The most commonly used diameters are 7 and 11 mm with a length of 40–200 mm. These data are indicated in the technical specifications of a specific model.
Power when choosing an electric heat gun
An important quantity is the power of the device, which ranges from 15–500 W. It determines how quickly the gun heats up and how many grams of glue it dispenses per minute. If you use it occasionally, a weak model up to 40 W is enough. The same power is chosen for very small jobs like kanzashi or gluing rhinestones. Small models are compact, heat up quickly and have a thin nozzle for tiny drops. For those who work with a pistol a lot, it is better to invest once in a device with a power of 300–500 W, so as not to be nervous about low performance and rapid breakdown in the future. In addition, such models accept any rods. If universal transparent ones begin to melt at a temperature of 80 0 C and are suitable for any gun, then black and yellow ones require a minimum of 150 0 C. Miniature devices simply cannot handle such loads. The heating temperature must be indicated on the packaging of the heat gun.
To work with small parts you need a thin nozzle. Otherwise, the drop of glue will be too large, and the work will turn out sloppy.
For precise gluing of small elements you need a heat gun with a thin nozzle
A good heat gun reaches operating temperature in 15–20 seconds and maintains it stably. It is desirable to have several operating modes. Then, by simply switching the regulator, you can switch to low or high temperature rods.
It is worth looking for a device with replaceable nozzles to adjust the diameter of the droplet. As a rule, there are three of them:
- Universal.
- Extra long.
- Wide slot.
Thanks to the removable nozzles, it is easy to regulate the flow of glue in the hot-melt gun
There are mains-powered models with a cord 1.0–3.5 m long. Battery-powered heat guns are convenient, but so far their price is much higher than network ones.
A big plus of a glue gun is the low cost and availability of consumables. Rods are sold in almost any tool, craft and office supply store. They are much cheaper than good adhesives, and are in no way inferior to them in connection strength.
How to use: charge, warm up, replace the rod
The small device is made using modern technology and is very easy to use. To avoid interruptions in work, the points for applying glue are planned in advance and all the necessary materials are prepared. The viscous mass cools quickly, especially in low-power models. The sooner you apply little things like beads, rhinestones or sequins, the stronger they hold on. The operating procedure is as follows:
- Connect the device to the network. If there is a power button, put it in operating mode.
To start working with the heat gun, plug the device into the network
- Insert the rod into the special rear hole until it stops. Leave to heat for the time specified in the instructions, ranging from 2-10 minutes. The plastic body of the heat gun also gets hot. By touching it, you can check the operating status of the device if there is no power indicator.
The hole for inserting the glue stick is located at the back of the hot-melt gun
- Press the feed control button. A drop of hot substance will appear - the device is ready for use.
If a drop of glue is released when the trigger is pressed smoothly, the heat gun is ready for use.
- Apply glue to one of the parts and immediately press the surfaces to be glued together. Can be applied spotwise or in a stream. The glue releases as long as the trigger is pulled.
The glue is applied pointwise or in a stream while the trigger of the heat gun is pressed
- If any remaining glue appears, remove it with a sharp knife after cooling. The hardening area can withstand mechanical loads after 5 minutes.
During a break in work, the gun is placed on a stand. The nozzle should point downwards; it is advisable to place some kind of substrate under it. Silicone is better because the glue does not stick to it. Then no hot residue will get onto the work surface.
A special stand for the heat gun protects the working surface from hot drops and fixes the device
In the window of the gun you can see when the rod ends. To continue work, insert the next one, which will push through the remains of the old one.
Materials that cause the glue to cool quickly (for example, metals) are preheated with a hairdryer before joining. On flexible materials (for example, fabrics), the adhesive solution is applied using a “caterpillar method”.
Bonding points can be separated by heating.
How to use a glue gun - video
Safety instructions for use
To ensure that needlework brings only joy, it is important to adhere to safety rules:
- carefully read the instructions, which indicate the permissible time of continuous operation. In household models this is usually 30 minutes. After this, turn off the device and let it cool down;
- do not heat the device without the glue stick;
- Always keep the work cable behind the heat gun;
- The glue and nozzle tip become hot and cause burns upon contact with skin. You can't touch them;
- Do not use the gun when it is wet or in a humid environment, such as a bathroom. Wet hands when working are also unacceptable;
- during breaks between working phases, place the device with emphasis on the folding stand. You can’t lay it horizontally - the glue will flood the insides, and the gun will soon have to be thrown away.
During work breaks, the heat gun is placed with emphasis on the stand
Problems and their solutions
The most common problem when working with a hot-melt gun is that the glue flows uncontrollably, without pressing the trigger. There may be several reasons:
- The temperature is too high for a particular rod. It is optimal when the heat gun has a heating regulator to set the required melting degrees. Otherwise you will have to replace the rods. In a good gun, the nozzle has a ball valve - the so-called drip protection;
- The rod is inserted too tightly. Sometimes it helps to move it back a little;
- rod diameter mismatch. Some models require decimal sizes. For example, Sigma - 11.2 mm. If you put an 11 mm rod into such a device, a pressure difference occurs inside the heater, and the glue flows back. Using rods of the correct diameter solves the issue;
- low quality pistol. You can insert a toothpick into the nozzle during a pause in work. Or accept it and try to finish the work as quickly as possible: the contents flow out very quickly.
If the glue stops coming out, the gun may be clogged. It is disassembled and cleaned. To avoid this, do not allow glue to stick around the nozzle.
You can get excellent results and joy from work only with a working hot glue gun
For battery-powered models, the glue sometimes becomes viscous and has difficulty passing through the nozzle. You need to reheat the device in the charging station.
In cheap models, when there is a break in use for several minutes, the pusher gets stuck in the soft rod and cannot move it. You need to turn off the gun and let it cool.
If the glue stretches like a thread and you can’t apply a dot, craftswomen advise keeping the rods in the refrigerator. Most likely they are of low quality.
How to change the color of the rod correctly
To prime the gun, the rod is simply inserted into a special hole at the back. After finishing work, you don’t have to remove it. Then the next time you turn on the device will be immediately ready for use.
A little trick. Short glue sticks have to be added frequently during the process. Using a heat gun, glue 2-4 sticks together - you will get one large one, which will last for a long time.
Sometimes it is necessary to change the color of the coming out glue, for example, blue to transparent. If the gun has cooled down, turn it on for about 1 minute, then carefully unscrew the rod. Charge a new one, press the trigger to squeeze out the remnants of the old one until the desired color appears.
The new rod, after insertion, by smoothly pressing the trigger, completely pushes out the remnants of the old one
How to use glue sticks without a gun
What to do if you don’t have a hot-melt gun or it’s broken, but you really want to use hot-melt adhesive because of its wonderful properties? Creative lovers find a way out of any situation. True, it is better not to count on cleanliness and accuracy of application:
- You can insert a piece of glue stick into the body of a ballpoint pen of a suitable diameter and melt the candles from the fire. This is quite inconvenient, because the quickly cooling glue needs to be constantly reheated;
- Travel enthusiasts will benefit from a method that requires a minimum of preliminary effort. Using a gun, apply a hot drop of glue to the match next to the sulfur head. Or they put circles several millimeters thick on it, which are cut off from the rod and trimmed to the middle. To melt the glue, simply light a match. This option works great in emergency situations.
The rod without the gun can be used as an eraser. For convenience, cut off a 0.5 cm piece and glue it to the end of the pencil.
Video: how to use hot melt glue without a gun
Examples of handicrafts with hot glue in the photo
 Coffee beans, hot glue and imagination create a masterpiece
  Shells and stones can be easily glued using a heat gun
  Glue gun is used in scrapbooking techniques
  Hot glue gun works great with natural materials
A real Renaissance has come for handicrafts. Materials and techniques have appeared that were never even dreamed of before. So many activities provide an outlet for creative energy, relieve stress and bring income to craftsmen. To keep up with the latest trends in the world of craftswomen and stay in trend, you have to keep up. So a good tool is never superfluous here.
Have you ever wondered what you can do with a glue gun? This is such a popular tool among life hack enthusiasts that many are already starting to joke about it. However, if you think about it, a glue gun is a really handy thing :)
Hot assistant
Today we will offer several practical uses for a hot gun. We assure you that you will even be surprised why you yourself didn’t think of doing this earlier.
The adhesive is strong enough for small repairs. It easily withstands moisture and is easily removed from most surfaces. For this reason, it is a great adhesive for temporary fixes and simple repairs!
Change your ring size
Resizing rings can be an expensive procedure. Hot glue is a great quick fix. Create a small puddle of hot glue on a piece of parchment and carefully dip the back of the ring into the glue. When it dries, leave as much glue as needed to reduce the size, and carefully cut off the rest.
Non-slip hangers
Photo source:There's nothing more annoying than when a top or blouse just won't stay on the hanger. For a quick fix, just use hot glue. Add a few drops of glue to each half of the hanger. Let the glue dry completely before hanging your clothes on it.
Close the boxes
 Photo source:
 Instead of fiddling with duct tape, why not use hot glue to seal the boxes? Just go over the joints and glue the lid together well.
Minor repairs
 Photo source:
 Hot glue works great for most small repairs. Things like torn books and toys can be easily salvaged with a little glue.
Have you ever wondered how to quickly fix a pair of glasses? A small drop of hot glue makes a great (albeit temporary) replacement for a nasal pillow.
Decorate the vase
Hot glue isn't just for gluing things together! Use it to decorate a simple vase or jar. You can make any beautiful patterns. And after that, cover the pattern with paint of any color.
Crafts using a glue gun can be simply a decorative element that pleases the eye and brings a bit of coziness and special charm to the house, or they can be truly functional. Things made with hot glue look original, and pride in interior elements made with your own hands is very justified. Let's look at some of the many existing examples of how to use a glue gun not only for its intended purpose.
Decorating a vase or candlestick
There are quite a few options on how to decorate a vase using hot glue, and we will look at some of them.
For example, one of the simplest ways to decorate an inexpensive glass vase without any designs is to simply draw lines on the walls of this utensil. You need to twist the object and apply even layers of glue in a circle. For convenience, you can ask someone to help rotate the vase while you decorate it. And for this you will need nothing at all: the candlestick itself or any other item and a glue gun directly charged and plugged into the outlet. Below is a photo of a craft made using a glue gun.
You can also make a cute holder for a glass, vase or candlestick. To do this, you will need to stock up on the item itself that needs decoration, filled with a glue gun, acrylic paint in a can or spray oil, but any vegetable will do. The vase must be washed and wiped dry, and then coat the outside with a thin layer of oil. Then the patterns should be applied in a chaotic order. It is worth making sure that the lines of the drawing are well intertwined and clearly drawn. This is necessary so that you can easily remove the holder from the glass. You need to draw a pattern both on the sides and on the bottom. Now you need to very carefully remove the frozen glue. The item of utensils that has been used should be thoroughly washed again. Next, paint the holder in the desired color, wait until the paint dries, and reinsert the glass, vase or candlestick into it. If necessary, they can be removed.
Let's consider another option for crafts using a glue gun in this topic. You will need a container that needs to be decorated. Transparent hemispheres should be glued quite tightly to its walls. You can additionally paint them in different colors, or you can leave them transparent. Both options will look stylish. The minimum supplies for this craft are: a glass, a jar or vase, half-pearls and a hot glue gun.
Snowflakes
To create this you need to have on hand a hot glue gun with glue, nail polish or regular acrylic paint, parchment paper and a snowflake stencil that you can either draw or print, but this item is optional for those who are sure that This will draw a beautiful snowflake. Place a snowflake drawn on writing paper under a parchment sheet, outline the drawing with hot glue and wait until it dries. Next, you need to carefully separate the almost finished craft from the parchment and paint it on both sides. Such snowflakes are well suited for interior decoration and New Year's costumes. And the same sheet of parchment paper can be used several times.
This is what these crafts made with a glue gun look like.

Multi-colored dots
Hot glue can be used to create the cutest pieces that will be useful for decorating other crafts in the future. One of them is multi-colored dots. To implement this idea, you need to have a gun loaded with hot glue and acrylic paints or varnish. Everything is done very simply: the required number of glue dots are applied to the oil-treated surface. After drying, they need to be painted. You can use such dots to decorate a variety of crafts, cards, etc. Such crafts using a glue gun are shown in the photo below.

Pouf made from car tire and twine
This is the most functional craft from our selection. It looks like a cool designer item, but it will cost mere pennies. So, what do you need to make a pouf? Tire, twine (or other rope), plywood, loaded hot glue gun, sandpaper, screws, jigsaw, furniture stapler, knife and drill.
Using a jigsaw, you need to cut a circle with a diameter slightly larger than the size of the hole in the tire. If necessary, the edges should be sanded. Then, a plywood blank is placed on the thoroughly cleaned pre-tire, which will become the basis for the craft using a glue gun, and holes are made for self-tapping screws in both parts. Next, they are fastened. From the center of the circle, they begin to lay the rope in a “snail” pattern, coating each subsequent turn with glue. When gluing is completed, carefully cut off the excess twine with a knife and shoot its end to the tire using a furniture stapler. Now the rope needs to be well treated with moisture-proof impregnation or varnished. After drying, the pouf can be used.
The article presents various crafts that can be made. You can attach the legs to the pouf with a glue gun.

Homemade bracelet
This decoration will appeal to both adults and children. Depends on how exactly the bracelet will be made. It's quite simple to make. On an aluminum soda can you need to apply several horizontal lines in a circle, which will be in fairly close contact with each other. The width of the bracelet will depend on the number of these lines. After the glue on the can has dried, it needs to be removed. In order for the blank to become a real bracelet, it can be painted and decorated with various rhinestones, stones, beads and anything else, depending on the imagination and capabilities of the craftsman.

Magic wands
A variety of crafts will help create the atmosphere of the world of JK Rowling's books. You can make magic wands using a glue gun. On wooden knitting needles or Chinese food chopsticks, you need to apply strips of glue to indicate handles, sometimes flowing onto the chopsticks themselves. The strips should be painted in metallic colors that are in harmony with the colors of the sticks themselves and decorated with beads or artificial pearls. So the fabulous paraphernalia for a stylized holiday, theatrical production or fan fiction is ready.

Precautions
Regardless of the type of crafts you can do with the glue gun you choose, you need to remember the safety rules:
First, don't give a plugged-in hot glue gun to children because they can get seriously burned.

Secondly, when working with glass and a glue gun in working condition, you must always wear safety glasses, since the container can burst and injure you.
And thirdly, jars, glasses or vases intended to become candlesticks must be taken quite wide in order to avoid melting of the pattern applied with glue, which can occur if the container gets very hot.
Useful tips
Regular glue gun with hot glue can be used not only for gluing various parts, but also for creating various patterns and crafts.
When working with hot glue, be careful and pay special attention to the safety of children because the glue gun heats up and the glue comes out very hot.
Here are some very interesting and extraordinary ideas on how else you can use a glue gun and hot glue:
Crafts made from glue. We use wax crayons.

You will need:
Glue gun
Wax crayons
* It is possible that after using wax crayons, your glue gun will deteriorate, so it is advisable to use an old or inexpensive gun.
*If children are working on the project, be careful when working with a hot glue gun and hot melted crayons.
1. Remove the labels (papers) from the crayons.
2. Cover your work area with an old towel.
3. Heat up the glue gun.

4. Carefully insert the chalk into the glue gun and gradually push it through. The glue gun trigger won't be able to push them through, so you'll have to do it by hand.

5. The wax will begin to melt and you will be able to use colored wax drops to create colorful blots.

Wax stamping is another way to use wax crayons and a glue gun to create vibrant images.

DIY glue crafts. Decorate a vase or candlestick with hot glue.

You will need:
Inexpensive, round vase or candlestick

Heat the glue and begin to carefully apply it to the vase, layer by layer, so that you end up with transparent lines on the walls of the vase.
If you want to make straighter lines, ask someone to help you - let them twist the vase for you while you apply the glue.

Unusual crafts. Hot glue corals.

You will need:
Thin wire
Hot glue gun
Acrylic paint
Brush
Piece of plywood
Nails and hammer.
Making red coral
1. Cut the wire into several pieces of different lengths. In this example, their length varies from 10 to 40 cm. Bend each piece in half.
2. Heat the glue and carefully cover all the pieces of wire with it.

3. Select the color you want to paint the coral, in this case red. Use acrylic paint to paint the glue on the wires.

4. When the paint is dry, you can assemble all the parts into one coral. Take 2-3 pieces of wire with glue and connect them together using another thin, clean wire (not covered with glue).
Add 2 more parts to the structure and connect them again with clean wire.

In order for the coral to stand on a flat surface, all ends of the clean wires must be twisted and bent into the shape of a stand (see image).

Making white coral
1. Cut 3 pieces of wire, each between 30 and 35 cm long, and twist their ends together.

2. Bend all the wires the way you like and place them on a flat surface to which hot glue will not stick - glass, for example.

3. Cover all the wires with glue. After this, you can add additional branches of glue to your design.

4. Once you have the coral in the shape you want, let the glue dry and paint it with white acrylic paint.

5. To make the base for the craft, prepare a piece of plywood and attach the ends of the wires to it with nails.
6. Cover the ends with glue and paint with acrylic paint.

Unusual DIY crafts. Snowflakes made from hot glue.

You will need:
Hot glue gun
Nail polish or acrylic paint
Parchment paper (NOT waxed (wax) paper)
A drawn snowflake shape (if desired).
1. Print or draw a snowflake on a regular sheet of paper and place the design under parchment paper.

2. Using a glue gun and hot glue, trace the snowflake design. Wait a minute for the glue to dry.
If necessary, after the glue has dried, you can straighten the shape a little using a hairdryer.
3. Carefully remove the snowflake from the paper. The paper can be further used to create several more snowflakes.

4. Both sides of the glue snowflake can be painted with nail polish or acrylic paint.
Original DIY crafts . Rolling pin with a pattern.

You will need:
Any rolling pin
Felt pen
1. Draw any pattern on the rolling pin. It is advisable not to draw too many lines.

2. Heat the glue and start applying it to the lines drawn on the rolling pin. It is advisable to carry out the entire process on a flat surface covered with newspaper or cardboard.

3. Once the glue is dry, you can use a rolling pin to create a design on the clay by rolling it out.
The glue can be removed and a different pattern applied.
Original crafts. Glass holder for candles.

You will need:
Small glass vase or glass
Hot glue gun
Aerosol or acrylic paint
Spray oil or simple vegetable oil.

It is advisable to choose a wide vase so that the heat from the candle inside does not heat the glue, which may leak.
1. Wash and dry the vase, then wipe it with vegetable oil and a paper napkin.
2. Start applying hot glue to the back of the bottom of the vase, drawing patterns with it. The main thing is that all the lines intertwine well so that it is easier to remove the glue from the vase.

Continue drawing patterns with glue on the sides of the vase.
It is advisable to wear glasses to protect your eyes, as the glue will heat the glass.
3. Once the glue has dried, carefully begin to separate the design from the vase. You may need to use a screwdriver, knife, or other tool to make it easier to separate the design from the glass vase.

4. Clean the vase from any remaining glue. Use dishwashing detergent.
5. Paint the glue design. If you are using spray paint, read the instructions carefully and act according to them.

Now you can insert a glass or vase into the candle holder and you will get an excellent interior decoration.

Interesting crafts for children. Multi-colored dots for various crafts.

You will need:
Hot glue gun
Acrylic paint or nail polish
Brush.
It will take a little practice to get these straight pieces, but eventually you will get the hang of it, and all these pieces can be used to make various crafts and cards.

Each dot can be painted with acrylic paint or nail polish.

Crafts for children: do-it-yourself printing (video)
* First, cover the table surface with a special silicone board or silicone oilcloth.
Crafts for the home: making a vase from glue (video)
Interesting DIY crafts. Makeup brush cleaning board