RGB LEDs: how they work, internal structure, how to connect, RGB-led and Arduino. How to properly connect an RGB LED strip to the controller. Correct diagrams with description RGB glow color
Now let's look at the multicolor LED, which is often called in abbreviation: RGB LED. RGB is an abbreviation that stands for: Red - red, Green - green, Blue - blue. That is, three separate LEDs are placed inside this device. Depending on the type, an RGB LED may have a common cathode or a common anode.
1. Mixing colors
Why is an RGB LED better than three conventional ones? It's all about the ability of our vision to mix light from different sources placed close to each other. For example, if we place blue and red LEDs next to each other, then at a distance of several meters their glow will merge and the eye will see one purple dot. And if we add green, the dot will appear white. This is exactly how computer monitors, televisions and outdoor screens work. The TV matrix consists of individual dots of different colors. If you take a magnifying glass and look through it at the monitor that is on, you can easily see these dots. But on an outdoor screen, the dots are not placed very densely, so that they can be distinguished with the naked eye. But from a distance of several tens of meters these points are indistinguishable. It turns out that the closer the multi-colored dots are to each other, the less distance the eye needs to mix these colors. Hence the conclusion: unlike three separate LEDs, the color mixing of an RGB LED is noticeable already at a distance of 30-70 cm. By the way, an RGB LED with a matte lens performs even better.2. Connecting an RGB LED to Arduino
Since the multicolor LED consists of three regular LEDs, we will connect them separately. Each LED is connected to its own pin and has its own separate resistor. In this tutorial we are using an RGB LED with a common cathode, so there will only be one wire to ground. Schematic diagram Layout appearance
3. Program for controlling an RGB LED
Let's create a simple program that will light each of the three colors in turn.<3; i++) pinMode(rgbPins[i], OUTPUT); } void loop() { digitalWrite(rgbPins, LOW); digitalWrite(rgbPins, HIGH); delay(500); digitalWrite(rgbPins, LOW); digitalWrite(rgbPins, HIGH); delay(500); digitalWrite(rgbPins, LOW); digitalWrite(rgbPins, HIGH); delay(500); }const byte rPin = 3; const byte gPin = 5; const byte bPin = 6; void setup() ( pinMode(rPin, OUTPUT); pinMode(gPin, OUTPUT); pinMode(bPin, OUTPUT); ) void loop() ( // turn off blue, turn on red digitalWrite(bPin, LOW); digitalWrite(rPin, HIGH); delay(500); // turn off red, turn on green digitalWrite(rPin, LOW); digitalWrite(gPin, HIGH); // turn off green, turn on blue digitalWrite(gPin, LOW); bPin, HIGH); delay(500); ) Load the program onto Arduino and observe the result. Your browser does not support the video tag. Let's optimize the program a little: instead of the variables rPin, gPin and bPin, we will use an array. This will help us in the next tasks.
const byte rgbPins = (3,5,6); void setup() ( for(byte i=0; i- 4. Seven colors of the rainbow
- Now let's try to light two colors at the same time. Let's program the following sequence of colors:
- red
- red + green = yellow
- green
- green + blue = light blue
blue + red = purple
We omitted the orange color for simplicity. So, it turned out to be six colors of the rainbow 🙂 const byte rgbPins = (3,5,6); const byte rainbow = ( (1,0,0), // red (1,1,0), // yellow (0,1,0), // green (0,1,1), // blue ( 0,0,1), // blue (1,0,1), // purple ); void setup() ( for(byte i=0; i 5. Smooth color change It was not in vain that we connected the RGB LED to pins 3, 5 and 6. As you know, these pins allow you to generate a PWM signal of different duty cycles. In other words, we can not just turn the LED on or off, but control the voltage level on it. This is done using the function<3; i++){ pinMode(rgbPins[i], OUTPUT); } // начальное состояние - горит красный цвет analogWrite(rgbPins, 255); analogWrite(rgbPins, 0); analogWrite(rgbPins, 0); } void loop() { // гасим красный, параллельно разжигаем зеленый for(int i=255; i>analogWrite. Let's make sure that our LED will transition between the colors of the rainbow not abruptly, but smoothly.
- Temperature indicator. Let's add a thermistor to the circuit and connect it to the analog input. The LED should change color depending on the temperature of the thermistor. The lower the temperature, the bluer the color, and the higher the temperature, the more red.
- RGB lamp with regulator. Let's add three variable resistors to the circuit and connect them to the analog inputs. The program should continuously read the resistor values and change the color of the corresponding RGB LED component.
In this article we will talk about color LEDs, the difference between a simple RGB LED and an addressable one, and add information about the areas of application, how they work, how control is carried out with schematic pictures of connecting LEDs.
1. Introduction to LEDs
LEDs are an electronic component capable of emitting light. Today they are widely used in various electronic equipment: flashlights, computers, household appliances, cars, phones, etc. Many microcontroller projects use LEDs in one way or another.
They have two main purposes:
Demonstration of equipment operation or notification of any event;
use for decorative purposes (lighting and visualization).
Inside, the LED consists of red (red), green (green) and blue (blue) crystals assembled in one housing. Hence the name - RGB (Fig. 1).

2. Using microcontrollers
With it you can get many different shades of light. The RGB LED is controlled using a microcontroller (MK), for example, Arduino (Fig. 2).

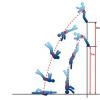
Of course, you can get by with a simple 5-volt power supply, 100-200 Ohm resistors to limit the current and three switches, but then you will have to control the glow and color manually. In this case, it will not be possible to achieve the desired shade of light (Fig. 3-4).


The problem arises when you need to connect hundreds of colored LEDs to the microcontroller. The number of pins on the controller is limited, and each LED needs power from four pins, three of which are responsible for color, and the fourth pin is common: depending on the type of LED, it can be an anode or cathode.
3. Controller for RGB control
To unload the MK terminals, special controllers WS2801 (5 volts) or WS2812B (12 volts) are used (Fig. 5).

With the use of a separate controller, there is no need to occupy several MK outputs; you can limit yourself to only one signal output. The MK sends a signal to the “Data” input of the WS2801 LED control controller.
This signal contains 24-bit information about color brightness (3 channels of 8 bits for each color), as well as information for the internal shift register. It is the shift register that allows you to determine which LED the information is addressed to. In this way, you can connect several LEDs in series, while still using one pin of the microcontroller (Fig. 6).

4. Addressable LED
This is an RGB LED, only with an integrated WS2801 controller directly on the chip. The LED housing is made in the form of an SMD component for surface mounting. This approach allows you to place the LEDs as close to each other as possible, making the glow more detailed (Fig. 7).

In online stores you can find addressable LED strips, where up to 144 pieces fit in one meter (Fig. 8).

It is worth considering that one LED consumes only 60-70 mA at full brightness; when connecting a strip, for example, with 90 LEDs, you will need a powerful power supply with a current of at least 5 amperes. Under no circumstances power the LED strip through the controller, otherwise it will overheat and burn out from the load. Use external power supplies (Fig. 9).

5. Lack of addressable LEDs
The addressable LED strip cannot operate at too low temperatures: at -15 the controller begins to malfunction; in severe frosts there is a high risk of its failure.
The second drawback is that if one LED fails, all the others along the chain will also refuse to work: the internal shift register will not be able to transmit information further.
6. Application of addressable LED strips
Addressable LED strips can be used for decorative lighting of cars, aquariums, photo frames and paintings, in room design, as New Year's decorations, etc.
An interesting solution is obtained if an LED strip is used as an Ambilight backlight for a computer monitor (Fig. 10-11).

If you use Arduino-based microcontrollers, you will need the FastLed library to simplify working with LED strip ().
LED strips have long been used for local lighting and as main lighting. But in addition to monochrome (one-color) different colors, there are controllable RGB tapes (Blue, Green, Red) that can change their color. One of the manufacturers of such devices is Apeyron.
RGB technology
There are a number of features in the design and operation of the multicolor strip.
Differences from regular tape
Like a regular one, RGB tape is a printed circuit board in the form of a narrow strip along which conductive strips are applied. Unlike the standard one, on the RGB tape there are not 2, but 4 or 5 such stripes - common and one for each color.
Resistors and LEDs are installed on the board using the SMM (Surface Mounted Mevice) method, which vary depending on the type of tape:
- Monochrome. Can be of any size and required color.
- RGB. It uses SMD 5050 LEDs. This diode consists of three LEDs in one package. In a monochrome ribbon they are one color, in a multicolor ribbon they are different (red, green and blue). This combination allows you to change the color of the device or make it white. Black color ensures the absence of light.
- RGBW In addition to colored diodes, white ones are installed in the strip. This gives additional control over the brightness and color of the light.
In addition to devices in which all LEDs of the same color are controlled simultaneously, there are devices with chip diodes. They contain a chip that allows you to control each LED individually. This makes it possible to implement effects such as “running lights” or “star rain”.
Example of an RGB strip boardBenefits and uses
The advantage of such LED devices is the ability to change the color of the lighting, both manually and according to a predetermined program, as well as the organization of various lighting effects - color shifts, flickering or, when connecting the controller to a computer or music center, light music.
Such devices are used in a variety of places:
- in the illumination of shop windows;
- advertising signs;
- creating a romantic atmosphere in the room;
- lighting of the corridor or bedroom - blue light turns on at night, and bright white light in the evening or when signaled by a motion sensor;
- aquarium lighting.
In addition to these options, many others are possible. The use of such devices is limited only by the designer’s imagination.
 Multi-colored ribbons give scope for design possibilities
 Tape selection
One of the questions that needs to be answered when organizing LED lighting is which strip to use.
Illumination level
First of all, you need to decide in what capacity the LED backlight will be used:
- Decorative lighting. The functionality of the controller is of primary importance.
- Zone lighting. This is additional lighting in the room. Its power is only a fraction of what is needed for the entire room.
- Workplace lighting. It is difficult to find out the required power, since it is usually used in conjunction with the main lighting. Determined by selection method or using online calculators.
- Basic lighting for the entire room. The power is determined by the area of the room and its purpose - in the bedroom it is 2 W/m2, in the kitchen or children's room - 3 W/m2, and in the brightest room - 3.5-4.
When drawing up the project, light loss in the diffuser or in the ceiling plinth is taken into account. They reach 50%. The option of two-zone and multi-zone illumination is possible.
 An example of using zone backlighting. Such a tape will not provide illumination of the entire room, but it can highlight the desired part
 LED type
The multi-color LED strip contains SMD5050 crystals measuring 5*5 mm, consisting of three diodes and having 6 pins. In a single-color strip they are the same color, but in an RGB strip they are different (red, green, blue). A roll of such tape is 5 meters long and has a power of 144 W.
In addition to regular diodes, there are chip diodes, WS2812B and WS2812S. Outwardly, they are similar to ordinary ones, but inside they contain a PWM controller that allows you to control each LED individually. They implement a variety of effects, such as “running lights” or “star rain”. From such devices you can mount an LED screen. The disadvantage is the high price and the need to use a special controller.
Diode Density
The brightness and price of an LED strip depends not only on the size and type of diodes. Equally important is the density of the crystals. In RGB tape it is 30–60 pcs/m. For greater brightness, two, three or four rows are used with a density of 120, 180, 240 pcs/m, respectively.
Ribbon color
The color of the RGB strip is adjusted by the brightness of LEDs of different colors. If the diodes turn on completely, the tape emits white light. By decreasing the brightness of one or two colors, the overall color of the tape changes. This is done using a controller.
 The controller allows you to adjust the brightness and color of the tape
 The RGB+WhiteRGBW LED strip is a two-row LED strip, in which one row is made of color LEDs and the second row is made of white LEDs. This makes it possible to obtain pastel colors, as well as increased brightness in normal lighting.
IP degree of protection
According to the level of protection from external conditions, devices are divided from unprotected (ip20, ip33) to partially protected (ip42, ip44) and sealed (ip67, ip68).
RGB strip power supply
The most common voltage of these devices is 12-24V. There are devices powered by 110 and even 220V, but they are not very common.
Selecting a power supply (driver) for a strip
The power supply for LED strips is selected based on the total power of the devices that will be connected to it. For example, if 5 meters with a power of 14.4 W/m and 3 meters with 7.2 W/m are connected, then the total load is 14.4*5+7.2*3=93.6 W. Considering the 20% margin (93.6+0.2x93.6= 112,32) , the power of the unit must be at least 112.32 W.

Expert opinion
Alexey Bartosh
Ask a question to an expertImportant! When connecting LED devices with long cables, larger cross-section wires are used to avoid voltage drop. Therefore, it is advisable to take several drivers instead of one and install them near the connection point.
Like the strips, power supplies come in dc12-24v as well as 110v.
How to control RGB strip light
To control the brightness of a single-color strip, you need a dimmer, but to take advantage of the full capabilities of multi-color devices, you need a controller. Otherwise, you will have to adjust each color separately, and the lighting effects will not be available.
 RGB strip controller kit
 Selecting a controller for RGB strip
The selection of a control device depends on three factors:
- Power. It is calculated in the same way as the required power of a power supply unit - based on the total number of connected devices. Sometimes, as when choosing a power supply, it is advisable to purchase not one powerful RGB controller, but a smaller one and an RGB repeater.
- The desired set of functions. There are a lot of types of control devices, but, for example, to illuminate goods in a display case or an aquarium, you do not need a device with a large number of lighting effects, and for additional lighting of the room, it is desirable to turn on a timer or light music.
- Remote control. Just like selecting features, sometimes it's necessary and other times it's a waste of money.
When selecting, these points are taken into account so as not to purchase an overly expensive device, and at the same time its capabilities are quite sufficient.
Types of controllers
There are different types of controllers for controlling RGB LED strips: from the simplest, push-button ones, to those equipped with microprocessors and Wi-Fi.
Conventional devices can only select a specific color and provide simple lighting effects. Used to illuminate shop windows and other places.
More complex models can be programmed to change colors and effects on a timer. They can have a connector for flash memory and respond to lighting in the room and outside. There are also Bluetooth controllers with a corresponding remote control.
The most complex devices can be connected to the smart home system.
Most bands have a remote control. It happens:
- on buttons;
- infrared;
- on radio signals;
- Bluetooth control;
- Wi-Fi control.
The last two can replace an iPhone or a mobile phone with Android.
 You can control the feed using your smartphone
 In addition to conventional controllers, there are homemade devices that operate on the Arduino microprocessor board. Such homemade products control simple or chip LEDs and create light or color-music effects. Motion or light sensors are also connected to the Arduino-controller.
RGB controller operating modes
LED strips are installed in two types:
- simple, controlled by changing the supply voltage simultaneously along the entire length;
- chipped, with digital control of the color of each diode individually.
Accordingly, the controllers operate in two modes - analog and digital. These are different types of devices and are not interchangeable.
Connection methods
There are two options for connecting an RGB strip:
- soldering;
- connectors.
Solder connection
In order to solder the cable to the LED strip, you must:
- Wire with a cross section of up to 0.5 mm2. A thicker one may tear off the contact pads.
- Soldering iron with power up to 25 W. A powerful soldering iron will overheat the soldering area, and the pad will peel off from the base.
- Solder and neutral flux.
- Heat shrink tube 30 mm long.
Expert opinion
Alexey Bartosh
Specialist in repair and maintenance of electrical equipment and industrial electronics.
Ask a question to an expertAttention! Active flux cannot be used. It will destroy the wire or contact strips, and also lead to a short circuit, after which the strip will have to be repaired.
Connectors for RGB LED strip
The modern connection method is connectors. These are small plastic devices with contact pads inside for connection to the tape. Their number should correspond to the number of conductive strips 2, 4 or 5.
These devices are available for various connection options:
- with leads for power supply;
- connecting, designed to connect two sections of strip;
- corner, for connecting at an angle;
- "T" or cross-shaped.
And many others. Using connectors, you can repair the device yourself.
Connecting to an RGB controller longer than its rated power
When controlling LEDs with a power exceeding the controller parameters, or when connecting devices located at a large distance, an RGB repeater is used.
The signal is sent to it from the controller via thin cables, and the device controls the glow of adjacent strips of tape.
Video review of the kit with remote control
📋 Take the test and test your knowledge

Modern lighting technologies make it possible to realize any designer’s ideas in the lighting design of rooms, rooms, kitchens, bathrooms, and bedrooms. Let's look at the features of the technical characteristics and application of RGB LED strip for 12V, 24V and 220V. Many people simply do not know about the high-voltage option. Also called multicolor or multicolor.

- 1. Characteristics
- 2. Power and brightness table
- 3. Four-color RGBW
- 4. Operating principle
- 5. Connection diagram
- 6. Control units
- 7. Example prices
- 8. Connectors for RGB LED strip
- 9. Video review of the operation of the kit with the remote control
Characteristics
 The difference between an RGB diode (left) and a regular white one. Photos in high quality, as if under a microscope
Mainly for the summer of 2015, three-color tape is produced on SMD 5050. Like the standard one, it is produced for 3 supply voltages 12V, 24V, 220V. Low-voltage ones are no different from each other, except for the installed resistor and have the same connection diagram in the circuit.
High-voltage differs in the principle of operation and connection of light elements. Main differences:
- diodes are connected in series in groups of 60;
- cut only in multiples of 1 meter, the usual multiples of 5 cm;
- is powered directly from a 220 volt network;
- if 1 LED fails, the whole meter goes out;
- protected by a silicone or PVC shell;
- can be connected in one piece, up to 80-100 meters, enough to wrap around a tower crane;
- flickers at a frequency of 100Hz.
Due to flicker with a frequency of 100 Hertz, it cannot be used in residential areas for constant lighting. This causes headaches and other ailments. To connect Volt, a rectifier is required, usually with a power of 500-900W, and a low price.
Power and brightness table
 Varieties of RSL, corner version
The standard number of LEDs is 30 led or 60 led per 1 m, rarely found at 72 led/m. The table shows the total brightness and power of all colors simultaneously on an SMD 5050 per 1 m of 12V tape.
| LEDs per meter | Brightness, Lm | Power, W |
| 15 | 200 | 3 |
| 30 | 400 | 6 |
| 60 | 800 | 12 |
| 72 | 940 | 14,4 |
| 120 | 1600 | 24 |
Four-color RGBW

I would especially like to highlight the RGB +W LED strip, also called multi-color, multi-color. The most interesting application is the use of tension, hanging or multi-level. But connection may require special control units and connectors. Another way is to use separate blocks for white and tricolor.

The first generation alternates between regular white and RGB LEDs. The white LED can be of any power from 3528 to 5630.
Thanks to rapid technological progress, the first generation quickly mutated into a second, more compact one. 4 crystals of different colors were placed in one case, including one with a phosphor. The result is a four-color LED 5050.
Principle of operation

The three-color RGB LED SMD 5050 consists of 3 SMD 3528 diodes placed in one housing. 3 different colors are used: R-red, G-green, B-blue. By mixing these 3 colors we get any colors and shades.
The visual difference between a regular tape and an RSL tape will be the presence of 3 resistors on one cutting section and the corresponding marking. The usual one has only one resistor.
- resistor for each LED;
- RGB colorless, normal yellow;
- 4 contact pads.
Connection diagram
 Parallel connection to the RGB controller
The control unit is marked and the wires have a corresponding color.

It is prohibited to connect a diode strip longer than 5 m in series, as the voltage drops and the copper conductor heats up. Towards the end it drops by 1.5 volts, resulting in 10-15% lower brightness at the end. So that the next segment after 5m. It was possible to fully connect, using an RGB amplifier. Over a long length, it amplifies the control voltage from the RGB controller. All this allows you to avoid using very long wires from the controller directly.
 Connection diagram for 220 volt model
The video review features one of the most popular and inexpensive kits. A colleague will demonstrate various operating modes. He will tell and show you the step-by-step connection of the LED kit:
- power supply electronic transformer;
- controller unit with remote control;
- strip light source.
Control units

The control unit is called the RGB controller, which performs the function of turning on each color channel. More advanced models can mix colors to produce 256 colors. Equipped with remote controls. The latest models are controlled via WiFi from an Android smartphone; a special application is required.

The design of high voltage differs from 12V. There is no 12V power supply in the circuit; the power is connected directly to the RSL controller.
Example prices
 An example of the correct average prices, the table shows the class of the RSL LED strip: Economy, Standard
Prices can increase greatly depending on the quality of the diode strip and the components used. Because LEDs are produced at a budget level, which the Chinese sell and which I do not recommend buying, they turn out to be more expensive and worse than in Russia due to the appreciation of the dollar in 2015. The most popular is the middle price segment, which has the optimal price-quality ratio.
Taking advantage of the difference in prices, although they appear to be the same, unscrupulous stores and sellers can sell budget goods as premium. Those who buy for the first time will not see the deception and differences. Quality, brightness and service life will be 2-3 times worse.
Connectors for RGB LED strip

The connectors consist of 4 wires with corresponding light markings. In addition to wire connectors, connectors are used, including angled ones. To avoid breaks during installation, it is produced in a corner version.

Video review of the kit with remote control
Video about the operating modes of the Chinese LED kit. Demonstration of the remote control operation.