Stages of installation of furniture hinges, marking and fastening
Many furniture is equipped with doors. The correct location of the hinges implies convenient use and a long service life of the door. Sometimes it happens that the door does not open well or mows a little. Such moments cause unpleasant emotions when using the closet. Therefore, it is worth taking a closer and more serious attitude to the fact that when furniture hinges are mounted, the installation of the markup should be carried out taking into account all the rules.
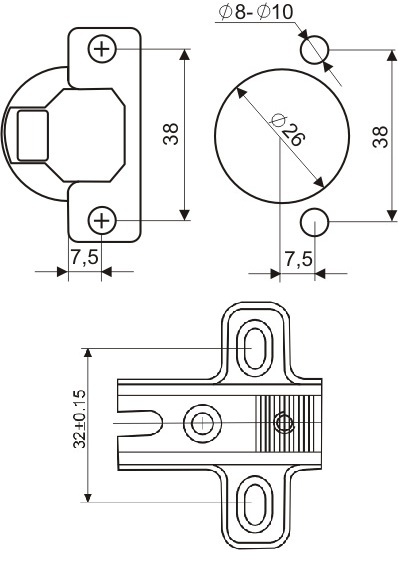
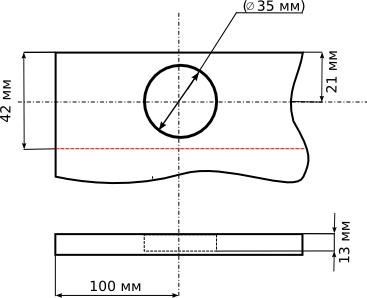
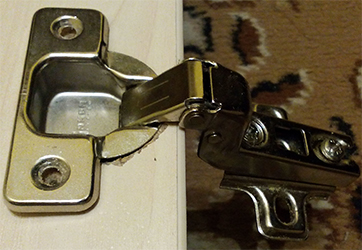
Do-it-yourself installation of loops begins with the analysis of the part itself. In the manufacture of furniture, various hinges on the cabinet are used. The most popular loops are overhead. They are used when fastening facades to the body. There are also semi-overhead, internal, corner, using a closer and spring. The question of how to install overhead furniture hinges will be considered in more detail. In particular, the well-known four-hinged model. These loops vary in size. The most common with a diameter of 35 mm. The canopy consists of the following parts:
- cup;
- mounting plate;
- shoulder.
The cup is fixed on the facade, and the mounting plate is fixed on the cabinet body. The shoulder is involved in the bridge connection of these two elements. To properly install furniture hinges with your own hands, you need to prepare the following tools and materials:
- screwdriver;
- drill;
- ruler;
- construction level;
- cutter;
- pencil;
- screwdriver;
- screws.
The cutter diameter is 35 mm. When all the tools and materials are ready, the next stage begins.
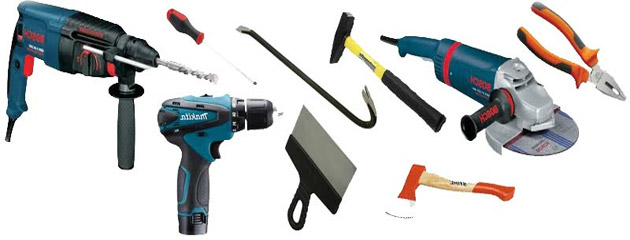
Instruments
markup
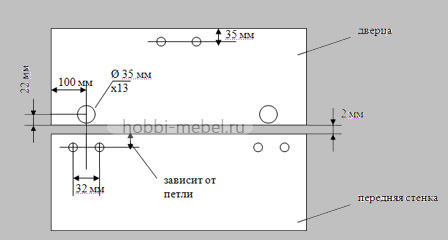
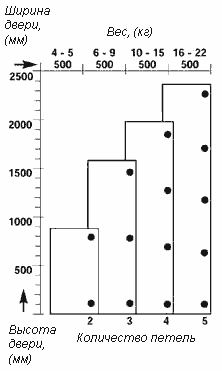
Do-it-yourself furniture hinge installation involves precise marking. Having made a bad markup, you can get flaws when opening the door. The marking process for furniture hinges involves finding the center of the hole for them. It should retreat 7-12 cm from the edge of the facade. The number of hinges installed on the door may vary. But you need to observe a certain distance between the canopies, equal to 50 cm. There is a certain dependence of the number of canopies on the parameters of the door.
| Facade weight, kg | Front length, cm | ||||
| Up to 50 | 50-100 | 100-150 | 150-200 | Over 200 | |
| Number of awnings | |||||
| 4-5 | 2 | ||||
| 6-9 | 2 | ||||
| 10-13 | 3 | ||||
| 14-18 | 5 | ||||
| Over 19 | 5 | ||||
When the number of canopies is determined, the center holes are marked relative to the width of the door. Moreover, the indent from the side of the door should be 2.1-2.2 cm. And it should also be borne in mind that the mount should not lie on the location of the shelves.
Thus, having measured the required distance from the top and bottom of the door, a mark is made. Further, observing the indentation relative to the width, the point of the future location is also marked. At the intersection of the measured marks, a notch should be made with a self-tapping screw or a nail. With a facade height of more than 100 cm, marks must be made every 50 cm.
Hole preparation
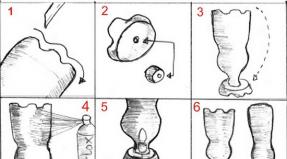
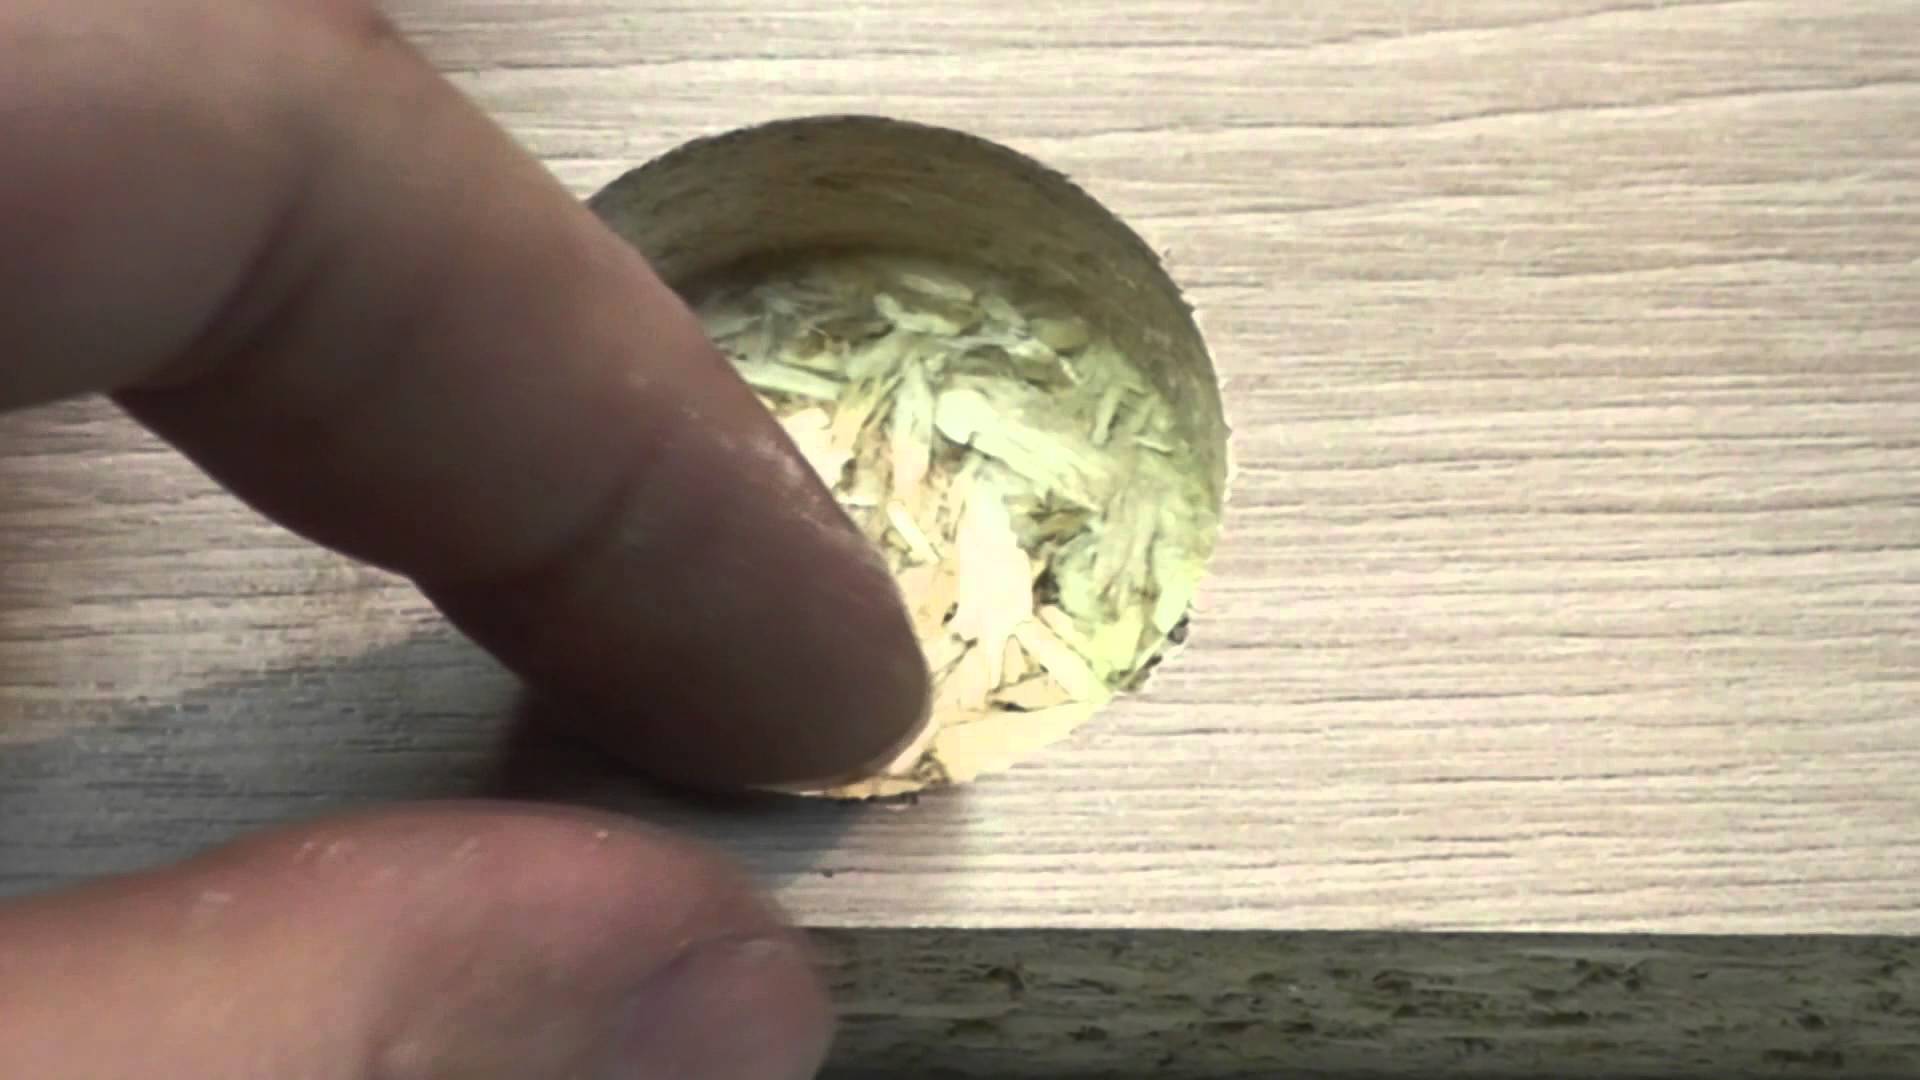
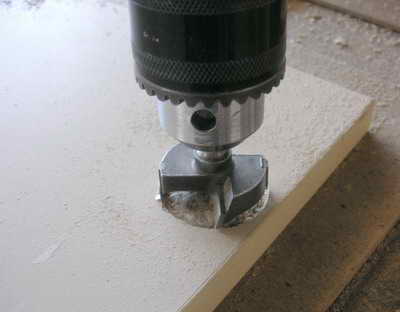
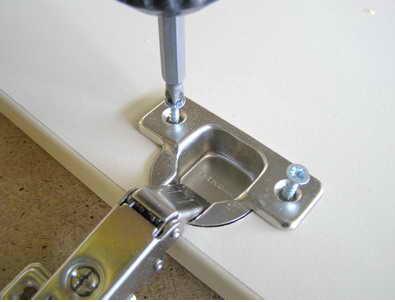
To understand how to properly install and hang hinges, it is important to follow all the required steps. The next installation step is how to embed furniture hinges? Using a drill or screwdriver, you need to drill holes. In this case, you need to use a cutter. The facade is laid on a solid surface. Drilling is carried out in the place of the markup.
Installation of a furniture hinge is carried out subject to the following conditions:
- the hole depth is 12-13 mm. The insert should not be deeper to avoid cracks on the front side of the door;
- the use of a sharpened cutter helps to eliminate chips or damage to the surface of the facade;
- the drill or screwdriver follows vertically, corresponding to the drilling axis, to avoid damaging the surface;
- do not drill in a hurry, otherwise the hole will be sloppy as a result.
After drilling for one hole, the next slots are drilled. When all the holes are made, the stage of laying the loop cups in them follows.
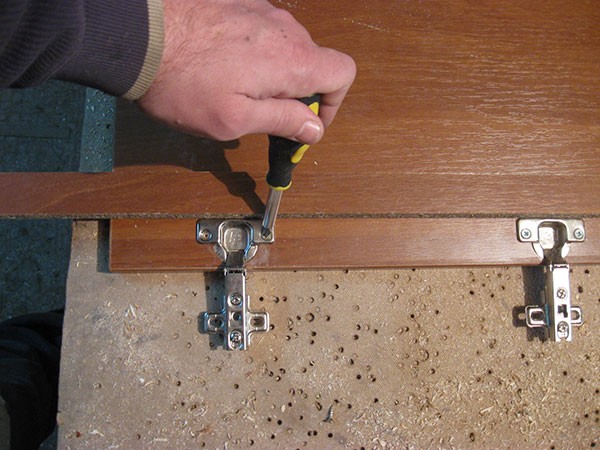
Hinge attachment
Hinges are placed in the holes and, using a ruler or level, adjust their position relative to the height of the facade. Each canopy should tightly touch the surface of the facade. If you do not adjust the location of the canopies, the door may take an oblique position. When the hinges are aligned, you should make marks for the screws. This can be done with a pencil or the screw itself. Next, use a screwdriver to screw the furniture hinges to the door.
Facade hanging
When the marking and installation of the furniture hinge is completed, the most difficult stage begins - fastening the door to be installed to the cabinet body. Door hanging progress:
- mark the places of installation of mounting sites for hinges;
- attaching a platform for fixing hinges that are installed on the facade;
- hang the door to the side of the cabinet;
- connection of two parts of the loop;
- adjusting the cabinet door relative to the cabinet with a screwdriver.
Hanging the door is best done on a flat surface. In this case, the side of the locker, on which the canopy bar is attached, must be in a horizontal position. This creates a certain convenience when trying on and screwing the facade to the sidewall. After screwing to the body, you can put the cabinet in a vertical position and adjust it relative to the body.
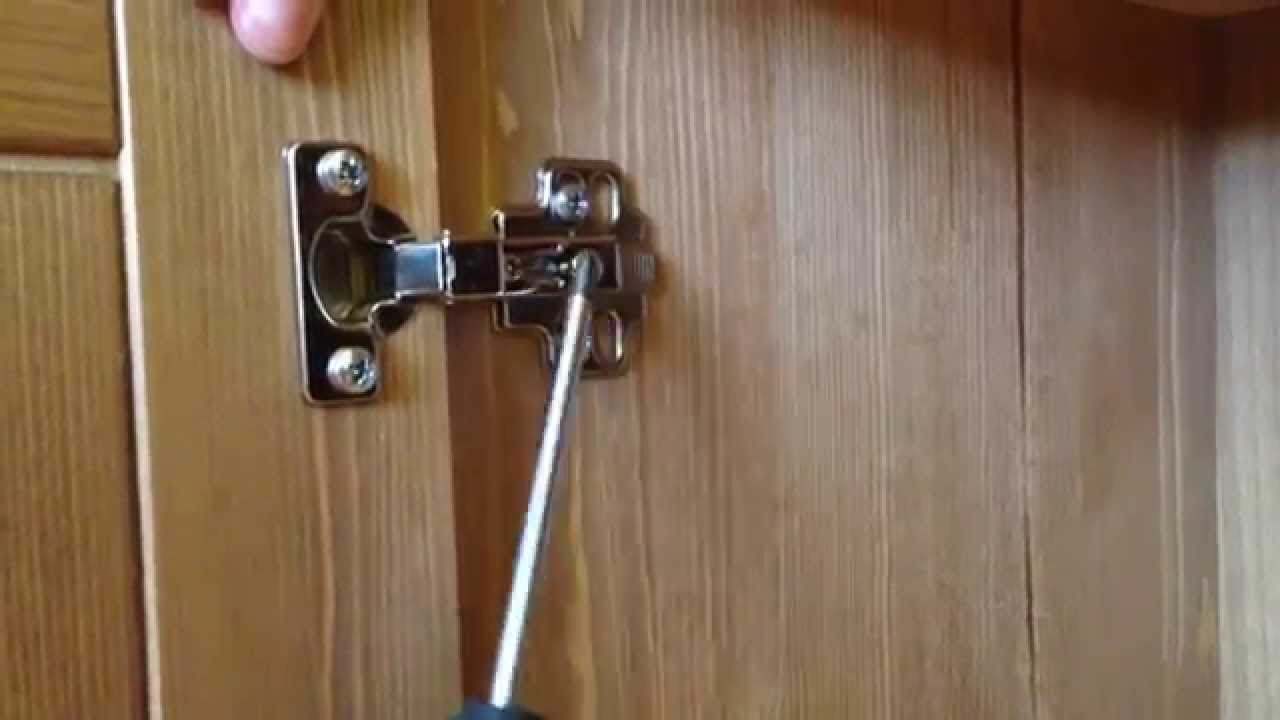
Adjustment
The final step in the installation of furniture canopies is regulation. After the door is attached to the body, it is necessary to make adjustments in three planes. Of course, you will have to unscrew and tighten the screw several times, but a favorable outcome is guaranteed. Three planes are vertical, horizontal and relative to the fixation depth:
- depth adjustment helps to press the front closer to the body or loosen it. Using a screwdriver, an oval hole is twisted. This type of adjustment is widely used in rooms where the floors have some kind of unevenness;
- vertical adjustment helps to move the facade in a vertical position. Adjustment is carried out by twisting the oval holes. After some time, the door may sag. Therefore, it is necessary to carry out adjustment of canopies sometimes;
- Horizontal adjustment involves moving the door from left to right or vice versa. Its purpose is to avoid gaps between the door and the cabinet body. Let's apply this method even in rooms with uneven walls and floors.
The adjustment step can be carried out when the cabinet is not yet hung. But, in order to immediately orient with respect to the walls and ceiling, it is best to hang the cabinet on the wall.
It turns out that to fasten the loops, you do not need to have special knowledge or skills. Installing a furniture hinge is not difficult at all. The main thing is that when installing the furniture hinge, the marking and installation were carried out taking into account all the rules. This avoids the appearance of cracks on the facade, gaps between the body and the door, friction when opening. Moreover, the work done by one's own hands brings a lot of positive emotions.