The correct solution for plastering the oven: proportions, composition, instructions
The stove is a practical and reliable source of heat. Arrangement of stove heating requires taking into account many nuances, including in the matter of external decoration. Extreme operating conditions, with a constant alternation of heating and cooling cycles, put forward stringent requirements for the composition of plaster mixtures, which must withstand temperature fluctuations, while maintaining decorative qualities. Today we will talk about how to make the right solution for plastering the oven so that it meets all the requirements for this type of building materials.
photo from the site http://1pokirpichy.ru
Oven plaster mortar: quality characteristics
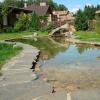
Finding a good stove-maker is not an easy task. But when he finished the work, the next problem arises in full growth, because now the furnace needs to be coated. Seams in masonry and uneven surfaces tend to accumulate dust and dirt. As a result, not only cleanliness suffers, since when heated, pollution tends to burn, filling the room with an unpleasant odor. In addition, over time, the masonry will lose its tightness, and the smoke will be drawn into the room.

photo from www.rmnt.ru
The easiest and most affordable way to finish the oven is plastering. When choosing which solution is needed for plastering the stove, it is necessary to take into account the characteristics that the coating should have after hardening, namely:
- Heat resistance. The ability to tolerate heating to sufficiently high temperatures without consequences is a basic requirement, without which all other qualities are irrelevant. The outer surface of the furnace, based on sanitary standards, heats up to 95⁰С. In practice, thin-walled or made in violation of the masonry technique, the furnace at certain points can have a heating of 120 ° C.
- Thermal conductivity. Do not forget that the main function is heating, which means that the conduction of heat from the walls into the room must be preserved, and mixtures with thermal insulation capabilities are categorically not suitable.
- Plastic. After drying, the coating should have the property of slightly stretching, repeating the change in the volume of the masonry when heated. Non-ductile renders will crack, requiring systematic restoration of the finish.
- Environmental friendliness. If toxic components are present in the solution, then when the temperature rises, they will be released into the air, which is undesirable for both residential and non-residential premises.
Thus, it is necessary to choose the composition of the solution for plastering the stove responsibly, because the efficiency of heating, the durability of the coating and the health of people living in the house depend on it.

photo from the site http://www.liveinternet.ru
Stove plaster: composition and varieties
Traditionally, clay-based mortars were used to plaster the furnace, which provided the necessary plasticity of the material. The masters selected the recipe and the ratio of the components empirically, largely focusing on their experience, and using small tricks that they were reluctant to share. Today, the building materials market offers many options for replacing the usual clay composition, giving the consumer a choice.
The following solutions are most often used for plastering ovens:
- Simple clay.
- Lime-gypsum.
- Cement-clay.
- Lime-clay.
- Ready-made heat-resistant plasters.
Regardless of the recipe chosen, the components used must meet certain requirements:
- Clay. Before preparing the solution, it is recommended to soak the clay for 24 hours, after which it is necessary to add water so that light impurities and dirt float up. Excess water is drained, and the clay is stirred until soft and homogeneous, after which a mixture of dry components is added.

photo from the site http://kharkovbeton.kh.ua
Clay fat control
You can check how greasy the clay used is using the Shepelev test. To do this, roll a walnut-sized ball out of it and squeeze it with your fingers. Normally, cracks on the surface of the ball are formed when compressed by 1/3, and clay that is too oily is more plastic and requires more compression.
- Sand. Fine river sand is used, which must be sieved through a 10 mm sieve to remove shells and other unwanted impurities. The amount of sand directly depends on the fat content of the clay - the higher this figure, the more sand you need. If wet sand is used, this must also be taken into account, as the recipes indicate the proportions for the dry state. In order not to be mistaken, the sand should be dried.
- Water. At the stage of construction work, insufficiently high-quality water is often used, which is unacceptable in the case of preparing plaster. The water should be odorless, musty or muddy, the iron content in it should also not exceed the norm. If the water turns yellow after settling, this is an indicator of an increased iron content and cannot be used.
- Binder. To give strength to the finished finish, a binder is needed, which is usually asbestos or shredded fiberglass. Some craftsmen prefer to use fine straw or hemp for this, appealing to the environmental friendliness of these materials.

photo from priusadebka.ru
How to prepare oven plaster mortar?
When preparing a solution, the main attention should be paid to the ratio of the components and the order of their mixing to obtain a homogeneous consistency. The standard method of preparation is mixing dry components, followed by adding liquid until the required density is obtained, but it is worth considering the nuances depending on the type of plaster chosen.
Simple clay mortar for plastering the oven
To prepare such a solution, you will need the following components:
- Clay - 1 part by volume.
- Sand - 2 parts by volume.
- Asbestos (fiberglass or straw) - 1/10 part by volume.
When preparing a clay mortar for plastering a stove, the proportions can vary. If the clay you received has a high fat content, the volume of sand must be increased to 3 or 4 parts, focusing on the results of the Shepelev test or your own experience.
The secret of experienced craftsmen
Experienced craftsmen advise adding 200 g of salt to a bucket of solution in order to avoid further cracks. This advice has a logical rationale - salt is hygroscopic, and slows down the setting of the plaster, making it dry evenly. Subsequently, when heated, hygroscopicity prevents drying and cracking of the coating.
Lime-gypsum mortar for plastering the stove

photo from the site http://nashaotdelka.ru
Components for this type can be bought at any building supermarket:
- Slaked lime - 2 parts by volume.
- Gypsum - 1 part by volume.
- Sand - 1 part by volume.
- Asbestos fiber 2/10 by volume.
Keep in mind that gypsum sets very quickly, and it is necessary to prepare the amount that you have time to work out within half an hour, because it will no longer work to dilute it after preparation.
Do-it-yourself cement-clay mortar for plastering the oven
The addition of cement is intended to give strength to the coating. The following mixing ratio is recommended:
- Portland cement - 1 part by volume.
- Clay - 1 part by volume.
- Sand - 2 parts by volume.
- Asbestos - 1/10 part by volume.
For mixing, it is convenient to use a drill with a mixer attachment, which will allow you to evenly mix the components, without the formation of lumps.
Lime-clay mortar for plastering the oven: proportions

photo from the site http://myshtukaturka.ru
To prepare such a composition, you will need:
- Lime - 1 part by volume.
- Clay - 1 part by volume.
- Sand - 2 parts by volume.
- Asbestos - 1/10 part by volume.
As you can see, the differences with the previous composition are small, but thanks to the addition of lime, such a clay solution for plastering the oven will turn out to be lighter, which means that fewer layers of paint will be needed to give the finished look.
Heat-resistant ready-made plasters
A limited number of manufacturers produce such highly specialized products, but in general, buying heat-resistant plaster will not be a problem, while the cost of domestically produced plasters is quite affordable.

photo from the site http://granstroy.ru
Products of the following brands are presented on the Russian market:
- Terracotta is a Russian company with a very democratic pricing policy. The prepared solution retains its properties for 60 minutes, giving even novice craftsmen time to work out.
- ORTNER is an Austrian brand specializing in materials for the construction of fireplaces and stoves. High quality is consistent with the cost of building mixes.
- Rath HefnerPuts is another representative of Austria, whose undoubted advantage is the fact that the mixture is not produced in dry form, but in the form of a solution, without requiring dilution.
- Plitonite is a domestic plaster containing reinforcing fibers. The curing time of Plitonit refractory plaster is 30 minutes, which is also quite a decent indicator.
- Stove - is a clay-cement mixture in which the optimal proportions have already been observed, and all that remains is to add water. This eliminates the need to think about how to prepare the clay mortar for plastering the oven.
As you can see, the choice is wide enough, and allows people with any financial capabilities to choose their own option. Ready-made refractory plasters can withstand temperatures of 400-600⁰C, so they can be used safely for the exterior of the oven.
Correct work with the correct solution
The characteristics of the plaster are important for the quality of the coating, but without adhering to the application technique, even an expensive solution will certainly crack during operation. Therefore, if you are doing the work yourself, strictly follow the algorithm of actions.

Photos from the site: homemasters.ru
Preparatory stage
- After the completion of the laying, the oven should stand for at least a month, until the end of the primary shrinkage.
- Perform jointing, deepening them by 5-10 mm to increase the area of contact with the mortar.
- Clean the wall from dust and dirt using a brush and heat the oven to 50-60⁰С.
- Moisten the masonry well with water to prevent the brick from absorbing moisture from the plaster, accelerating its drying.
Reinforcement of the finishing layer

photo from the site http://obustroeno.com
It is imperative to reinforce the surface, and there are several options for performing this stage:
- Metallic soft mesh. The metal must be galvanized so that the contours of the mesh do not show through with streaks of rust. You need to take care of fastening the mesh even at the stage of laying the masonry, leaving wire outlets for it. If this has not been done, then the mesh will have to be fastened with screws or nails into the seams.
- Burlap or gauze. Opponents of this method of reinforcement point to the combustibility of burlap, while supporters talk about environmental friendliness and the impossibility of ignition in the thinness of clay. Having made the decision to reinforce the plaster with burlap, it is cut into squares, dipped in a liquid solution and glued to the wall after spraying.
Plastering
photo from the site http://kursremonta.ru
The plastering stage will require the execution of work in the following sequence:
- Padding. Deep penetration primers should be used and the surface should be primed before each layer is applied.
- Splashing. For spraying, use a brush and the same solution as for plaster, only diluted with water to the consistency of liquid kefir. This is done to fill in small irregularities and roughness so as not to leave air voids that will lead to cracks.
- Plaster. The solution is tossed with a trowel and smoothed with a trowel, the thickness of each layer is 2-3 mm, while it is desirable to maintain the total thickness of the plaster within 10-15 mm.
- Covering. It is also performed with a liquid solution, after which it is rubbed with a trowel. In the case of clay mixtures, grouting can be done with a cloth soaked in solution.
- In the next three days, it is impossible to melt the furnace, and the first heating should not exceed half the maximum power of the furnace.
If the finished plaster is still cracked, the crack must be repaired. To do this, it is expanded with a spatula, the surface is moistened and filled with the same compound that was used during the main work. Do not forget about the primer and grout.
Now you know exactly how to make a solution for plastering a stove, and may it please you for many years with its impeccable appearance and cozy warmth.