How to build a hozblok in the country with your own hands drawings dimensions
Today, almost all suburban areas have a building called "hozblok", so it is important to know how to build it in the country with your own hands step by step according to the photo. We offer you step-by-step instructions for building a utility block with a shower, toilet or without amenities.
Do-it-yourself construction of a hozblok in the country
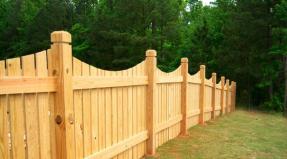
The hozblok is designed to store various items, inventory, or you can place a toilet and a shower in it. Such a building is good because it can be divided into several sections for different purposes, for example, a summer kitchen, a bathroom, a shower, a toilet.
Before you start building, you need to know in advance what will be stored in it or what it is intended for. In fact, all work on the hozblok is divided into stages:
- preparation for fundamental installation;
- setting a general form;
- frame installation;
- mounting;
- sheathing.
Hozbloki and change houses for giving with a toilet and a shower with their own hands
The construction of a change house can be carried out according to any plans and drawings, the main thing is that the hozblok fully meets your requirements. It is quite possible to build both a typical barn and a house that will beckon to itself.

Those who do not like to bother for a long time can purchase a ready-made construction of a utility block or change house, which after delivery will only need to be folded like Lego, spending no more than one day on it. You can buy the design of a hozblok for a summer residence with a shower and a toilet at a hardware store. The main material of this structure is a channel and a corner, and the cladding consists of wooden slabs.
Ready-made household blocks for summer cottages have several advantages:
- The simplest drawing.
- Saving time and money.
- No need for foundation pouring.
- Possibility of disassembly and re-assembly of the structure.
- Availability of acquisition of a hozblok.

If you have a desire to build a hozblok yourself, then for this you only need to purchase the necessary tools and materials, as well as use detailed drawings and take into account the dimensions. The most common material for outdoor buildings is wood. It has a lot of advantages compared to other similar materials:
- Plastic.
- Pretty high level of durability.
- It is easy to handle.
- Does not require any special knowledge to work.
- In addition to everything, a wooden building will last for more than a dozen years.
It is quite simple to build a wooden hozblok or a change house in the country with a toilet and a shower, the main thing is to assemble the structure correctly. If there is a desire to improve the general characteristics of your structure, you can also use lining or profiled sheet. If all this is applied, then daylight will be present in the change house, which will help maintain its condition, and will help maintain the temperature itself.
Watch the video: Do-it-yourself frame change house - the construction process
In order to divide the hozblok in the country into several sections, you can use a cabinet or a partition. If you plan to use a change house with a toilet in the winter, you can insulate it from the inside from all sides. To do this, you need to choose materials with good thermal insulation.
Installation of a hozblok in the country with a shower and toilet
Now many companies offer various ready-made change houses, in which there are different internal divisions. But most summer residents are of the opinion that a do-it-yourself construction with a shower and toilet will be more practical and free in planning.
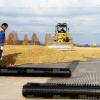
Stage 1. Foundation installation

It is necessary to remove about 20 cm of soil from the marking, then cover about 10 cm with sand and tamp well.
Stage 2. Preparation in the installation of columns.
A hole about 1 m deep is dug under each column. At each step, consider the size of the future utility room, because all the nuances depend on them. Before installing the columns, you need to prepare a hole, and sprinkle its bottom with gravel or sand so that it is solid.
Stage 3. Installation of columns

After the preliminary steps, the installation of the poles itself is carried out, but their perpendicularity must be checked before fixing. Fixing is carried out by pouring sand into the hole. To be sure, you can fill the pipes with cement. This will extend the service life.
Stage 4. Preparatory work before the installation of the hozblok
You can start the next stage no earlier than two weeks later, and during this time you can start assembling the frame. You can connect all the details of a wooden hozblok for a summer residence with a shower and toilet using self-tapping screws. Do not forget about antiseptics, they can be replaced with paint with a linseed base. Everything is ready for the construction of the hozblok. The matter remains for the small, for installation.
Stage 5. How to build a hozblok, see the video:
If you will know how to build a hozblok in the country with your own hands step by step according to the photo, then you can build a comfortable and functional building with a shower, toilet or other amenities needed in the country.