Shower drain in the floor: how to do it?
Until quite recently, the ultimate dream of almost any Soviet person was a small but comfortable apartment with an ordinary bathroom. At that time, perhaps no one thought about arranging the bathroom to your liking. There was a lack of appropriate equipment and suitable building materials.
Unique Solution
Already today, each bathroom is designed to meet the needs of the owner of an apartment or house. In this room, you can find a variety of solutions, as one of them is an additional drain located in the bathroom floor. Such a device allows you to protect yourself from leaks and equip a shower without a pallet.
Drain siphon
Before you make a shower drain in the floor, you need to think about the material at the base of the siphon. For its manufacture, plastic, brass or stainless steel can be used. The structure must be collapsible, only in this case it can be dismantled for cleaning, and then reassembled.
What is a ladder
A shower drain in the floor is called a drain. This is a special device with which the liquid flows into the sewer pipe. The system is designed in such a way that it filters the liquid, separating large fractional contaminants, and also efficiently and quickly removes wastewater. Thus, unpleasant odors do not appear in the room, and the drain system cannot be contaminated. Having visited the store, you can find the described device of two types: with a water seal and a dry seal.
For reference
When draining is performed, it can be installed in the recess of the pit. At the same time, the sewer pipe system is laid below its level, which will guarantee normal drainage. Such drainage systems, as a rule, are equipped on the first floors.
Floor drain work
The easiest to implement is a shower drain in the floor, which is arranged in an inclined structure. Such a system looks very attractive. Its arrangement is carried out in several stages. Initially, it is necessary to determine the place where the shower will be located, this will allow marking. The shower drain in the floor will have a form of concrete, which is mounted in the next step. For this, a wooden frame is assembled in the form of a box, which is formed from boards 5x10 cm. Then you can proceed to laying the waterproofing layer. The rubber membrane is the most suitable.
The coating must be laid in such a way that it covers the bottom of the mold and completely extends onto the wall to a height of 20 centimeters. If you decide to implement a shower drain in the floor, how to make it (it is recommended to consider the photo in the article), you can decide by reading the recommendations below in more detail.
The next step is to attach the insulating sheet. It is necessary to start these works from the corner, sipping the cloth and leveling it. The material must be firmly attached to the board using special nails, and the fasteners are installed at a height of 20 centimeters from the bottom of the structure or higher. After the arrangement of the drain hole begins, for this, with a sharp knife, you need to cut a circle, the diameter of which matches the size of the drain. If the hole is made larger, then water will seep under the insulating layer.
The drain plate is put in place and reinforced with bolts, now you can mount the drain. It is sealed with a protective tape, which will prepare the device for pouring cement mortar. When the floor shower drain is done, the next step is to prepare the concrete mortar, which is then laid on the base. At the walls, the layer width will be approximately 6 centimeters, and in the area of \u200b\u200bthe drain - 3 centimeters. These manipulations should be done with the flat side of the spatula. After the laying is completed, the base is dried, and then you can proceed with the installation of the finish coating.
Laying a sloping floor with a ladder
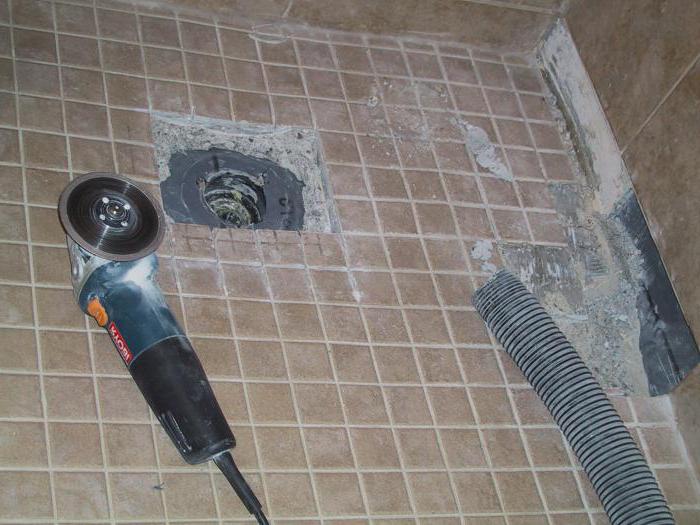
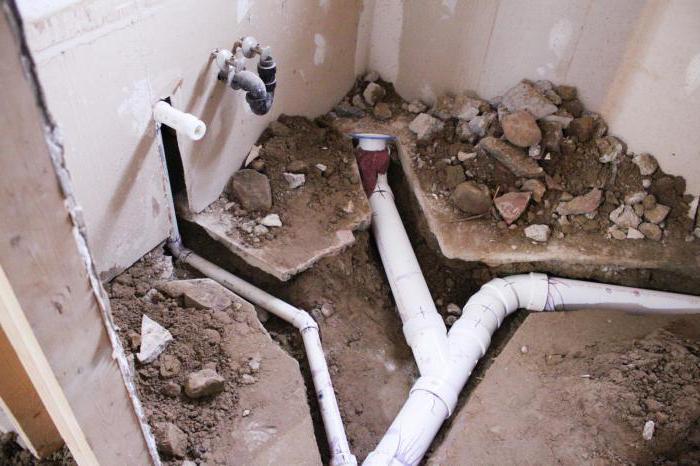
Arranging a floor with a slope is quite difficult to produce; at the first stage, it is necessary to determine the type of slope. Drainage can occur from two planes or through the so-called envelope. Be that as it may, work must begin with the preparation of the foundation. The old coating is dismantled, if any. The concrete screed, which has served for some time, should also be disposed of. To carry out these works, it may be necessary to use a puncher, which is especially true for wall-to-floor joints.
The cleaned substrate should be analyzed for cracks and holes that should be repaired. Before you install a shower drain in the floor, you need to carefully prepare the base, you can use inexpensive tile adhesive to eliminate subfloor errors. This will eliminate the rapid wear of the new screed and the insulating layer. Experts do not advise neglecting this stage, as otherwise you will encounter overspending of the primer and waterproofing. If there are significant irregularities on the rough base, then they can be leveled with special compounds. After the surface dries, it must be coated with a primer.
Carrying out waterproofing
If you decide to equip a shower with a drain in the floor, then the next step is to carry out waterproofing work. This event is mandatory, as it minimizes damage from possible leaks. To do this, you can use different types of coatings, but the most popular are coating and gluing materials. The first variety is ready-made formulations or dry mixes, which are highly water resistant. They have the consistency of sour cream and are applied to the surface with a roller or brush.
Floor and wall joints must be insulated with waterproof tape before application. The material is applied in several layers, the number of which will depend on the type of coating. This also applies to drying times. Pasting insulation is presented for sale in the form of rolled coatings, which most often have a self-adhesive layer. The advantages of this insulation are that the panels do not provide for the need for additional application of the adhesive composition or heating. The coating should be covered with a minimum overlap, while the master should bring it a little to the walls. And the height of such an “entry” should be about 20 centimeters, which will allow the formation of a waterproof bowl.
Screed and cladding
The drain to the floor in the shower must have a layer of screed, which is laid after the waterproofing layer has dried. To do this, prepare a solution of cement and sand, but first you need to mark the installation area. The location of the drain and the future height of the device are determined at this stage. Here it is important to consider what will be the width of the finish coating. If you plan to use tiles, then the choice of a place for draining should be made taking into account that the distance from the wall to the ladder is a multiple of its dimensions, 2 millimeters must be added to this value for each seam. This will simplify the laying of the cladding, and you will eliminate the need for trimming the material.
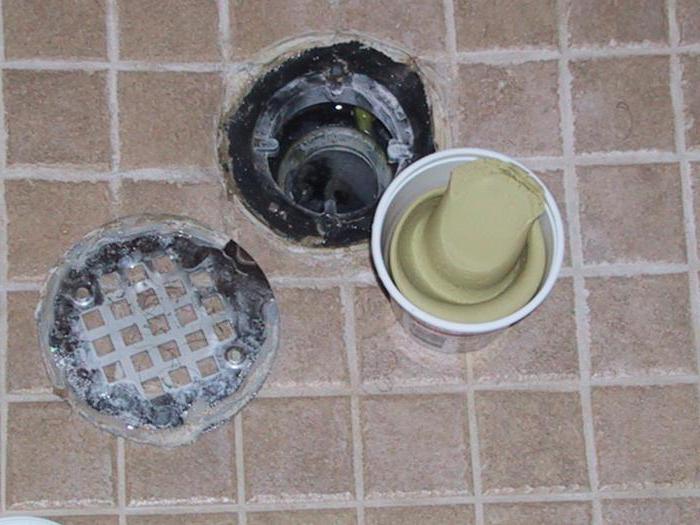
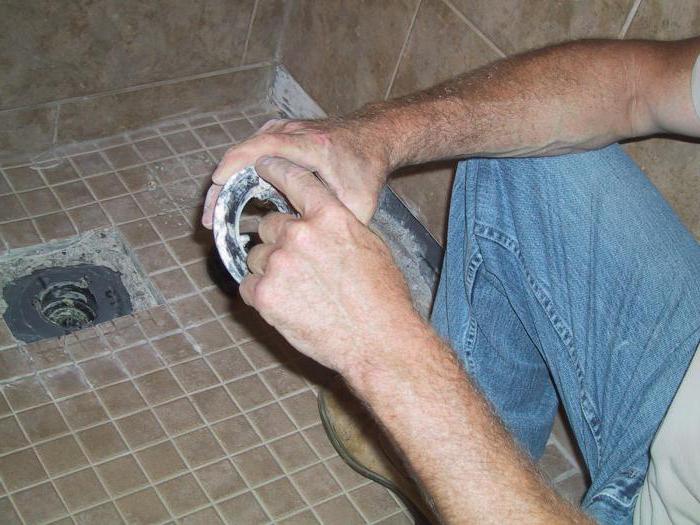
Ladder installation
The drain to the floor in the shower is installed at the next stage, it is necessary to mark the desired height on the parts, and then cut off the excess with a hacksaw. An O-ring must be inserted into the groove, and the assembly must be mounted in its intended place. The master adjusts the device, and its upper part must be covered with a film or any other similar material to prevent the ingress of concrete mortar, dirt and debris during the pouring of the screed.
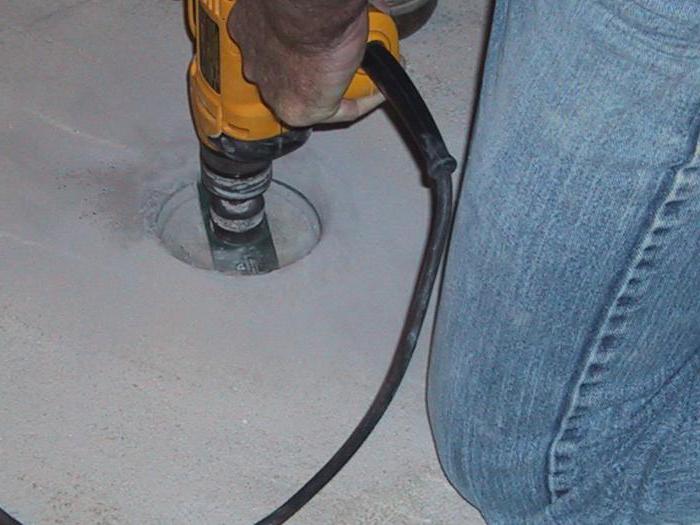
After that, you can proceed to setting the beacons, for this the level of the height of the future floor is determined by the level, and a cord is pulled between the established marks to align the profiles. To equip the slope to the drain, you need to install the beacons accordingly. The minimum slope should be 1 centimeter per meter. If this value is reduced, then the water will not have time to go into the sewer system. The next step will be laying the mortar, which needs to fill the entire space to the highest point of the lighthouse. To level the layer, use a spatula and a rule.
If you are thinking about how to make a drain in the shower in the floor, then after pouring the solution, you need to process it with a spiked roller, which will rid the mixture of air bubbles. Then the screed is left to dry completely, and after that the protective material can be removed from the drain. The master mounts the siphon cup, and a sealing ring is fixed on top of it, the device is closed with a lid. Some models require the use of an additional rubber insert that protects the finish from moisture.
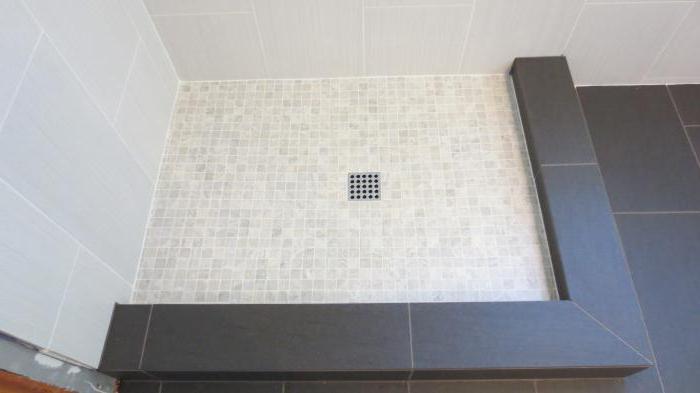
Now you can start laying the flooring. The most popular in this case is the tile, which is laid in an envelope. If you decide to use this technique, then first a decorative frieze is mounted around the perimeter of the walls. Its width can be two or three rows. If you are wondering how to make a floor in the shower with a drain, then the next step will be near the ladder. Then you can move on to facing the rest of the plane, which diverges into triangles. The seams between the tiles will be oriented parallel to the frieze. First, it is recommended to use solid products, only then cut elements should be used.