Shower drain in the floor under the tile: varieties and features of self-assembly
Arranging a bathroom in an apartment takes a lot of time for property owners, especially if the dimensions of the room are very small and there is no way to put a bathroom. In such cases, there is a way out - to install a shower drain in the floor under the tiles. It takes up much less space along with the shower and does not require the installation of a pallet. The absence of a threshold is especially convenient if elderly people live with you, who already find it difficult to raise their legs up.
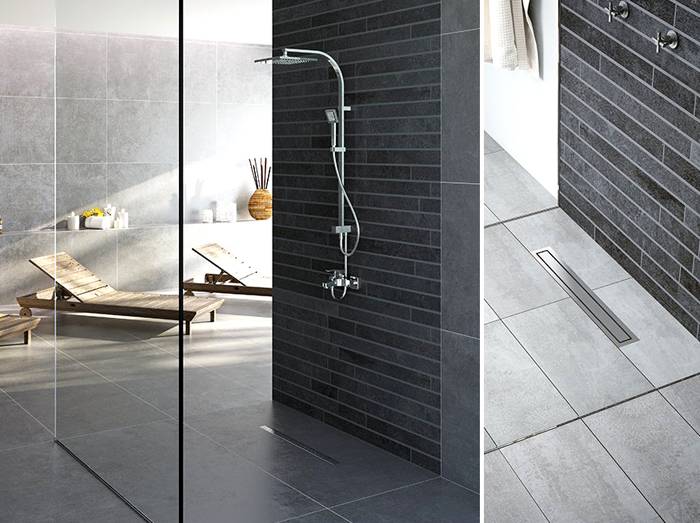
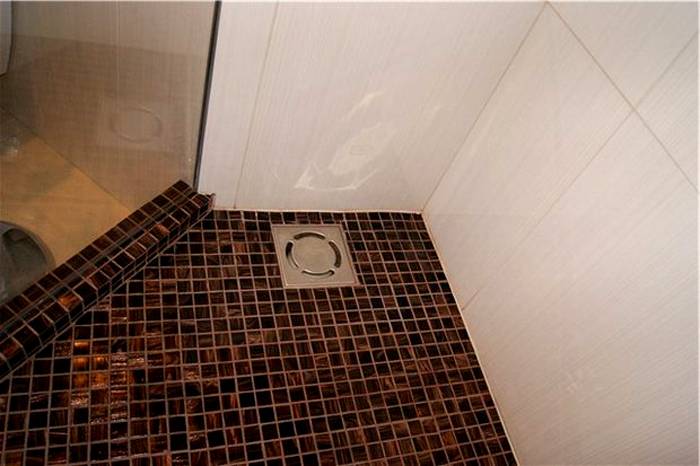
Modern shower room with a drain under the tiles
The shower drain in the floor below is a decorated design of a hole for draining the liquid. It is popular in foreign countries, in Russia such design can be found in sanatoriums and hospitals, and with the latest fashion trends in apartments.
The design itself is made of metal or plastic and is quite simple. But it lasts a long time and is cheap.
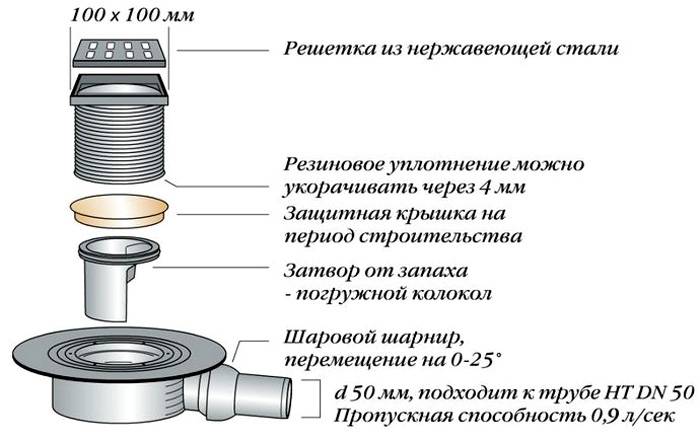
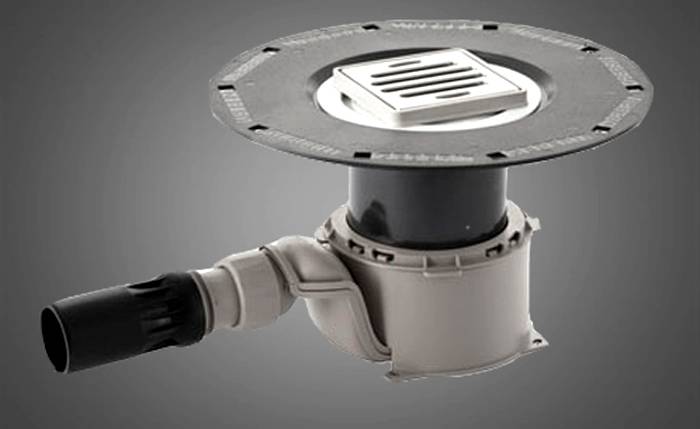
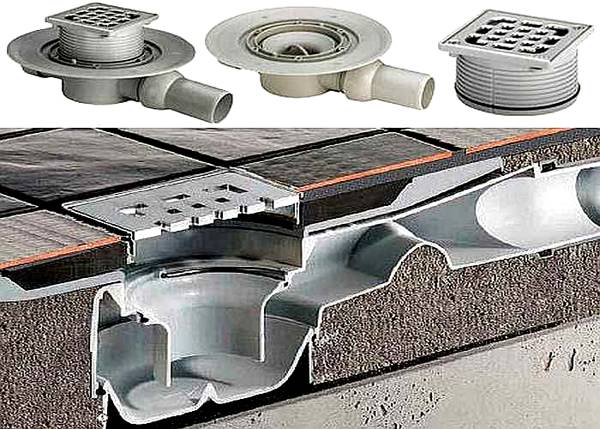
The ladder consists of the following elements:
- Funnel with filter. This part receives drained water, in its lower part there is an outlet pipe that is connected to the sewer.
- Grid for decor, which can be easily dismantled at any time. It is required to retain dirt.
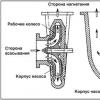
- Siphon. It is needed to create a hydrolock and is an obstacle to the penetration of odors.
The device is very simple and easy to clean.
Device types
Traps for draining water can be of several types and are installed anywhere in the shower.
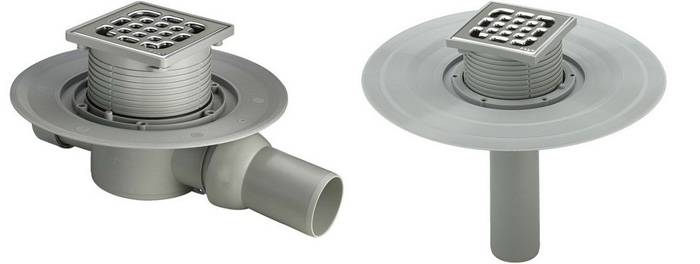
A vertical or horizontal drain is suitable for installation on the floor.
Note! Pay attention to the direction of the pipe leading to the sewer.
There are also different types of water seal:
- Normal. It is formed directly in the siphon, thanks to which the water does not dry out even when the shower is not used for a long time, which means that the smell does not penetrate inside.
- Ladder with a dry shutter for a shower. This is the most common option, as it provides absolute isolation from sewer odors.
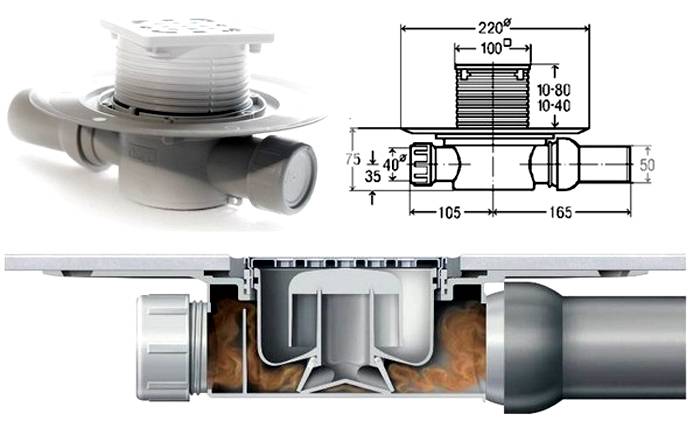
Not in last place when choosing a device is the height of the device, since the level of floor elevation also depends on it. The higher, the better the throughput. The most common and convenient option is an adjustable fixture.
Benefits of using
The use of trapiki for the shower has a number of advantages:
- Lots of variety in size and design.
- Externally, the space will become wider in the shower.
- Even in case of any emergencies, you will always have an additional floor drain so as not to flood your apartment and your neighbors.
- Without a pallet, it is easier to monitor the hygiene of the shower cabin.
The only downside to a tile floor shower drain is that it is more difficult to install compared to a conventional sewer.
Shower drain in the floor under the tile: location options and installation
Usually the installation of the ladder occurs even before the screed is poured. In your own house, this is easy to do at the construction stage, but in apartments it is quite difficult to make a drainage system. In some cases, you will have to raise the floor by as much as 15 cm, and you also need to create a slope so that the water flows into the funnel.
Ladder location options
There are several ways to position the shower drain in the floor under the tiles:
- Central, with the creation of a slight slope in one direction.
- Angular. It has a number of advantages, including stealth. It can be mounted in two planes, which ensures that it flows to the desired angle.
- Near the wall. It is enough to make a slope only in one direction. This design is practically not clogged and imperceptible to prying eyes.
Helpful information! choose the location that is easiest to maintain in your bath, as the drain requires periodic cleaning.
Installation of a shower cabin without a pallet on the floor
Consider how to make a shower without a pallet in an apartment and install the ladder correctly.
Helpful information! It is best to carry out installation at the construction stage.
Let's get to work:
- First of all, note that the device is mounted so that its surface does not rise above the floor. You can choose a model that will change the height of the slope per centimeter of area.
- If you are installing in a private house and the floor is located directly on the ground, then additional compaction is necessary, as this will help to avoid damage and cracks in the concrete. Extruded polystyrene foam is suitable as a heater.
- To create the necessary slope, use a screed, while not forgetting the aesthetic appearance of the ladder. That is, the product can be removed from the wall only to the distance that is calculated for the tile of the shower cabin, while not forgetting about the seams.
Note! Before installation, you should already have a ladder selected in order to know its exact dimensions.
The sequence of work with a detailed description:
- Measure the location of the ladder using a tape measure.
- Connect the product to the sewer pipe. The slope should be 3 cm.
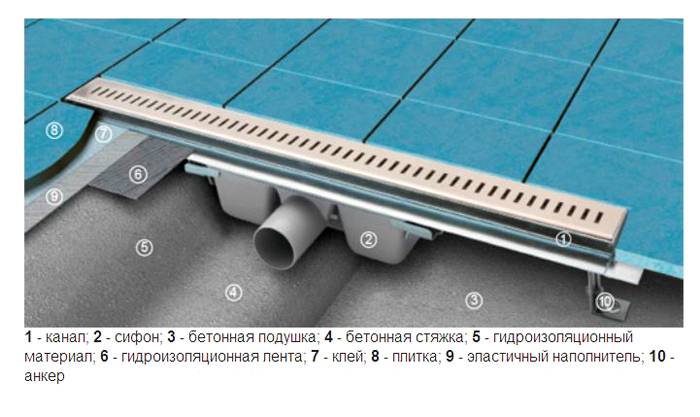
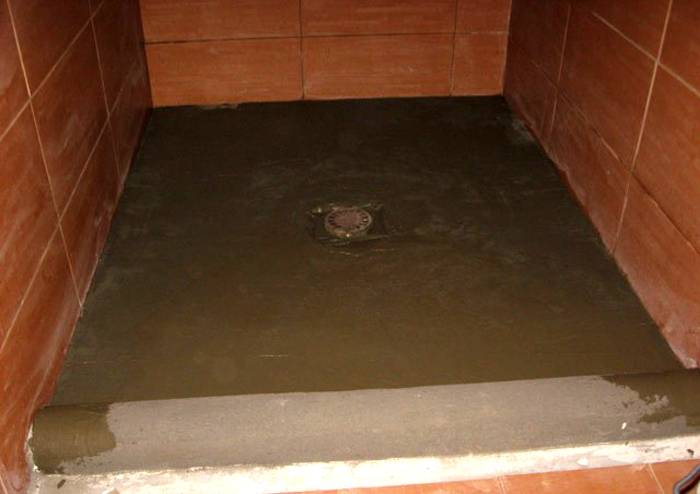
- Make a layer of thermal insulation.
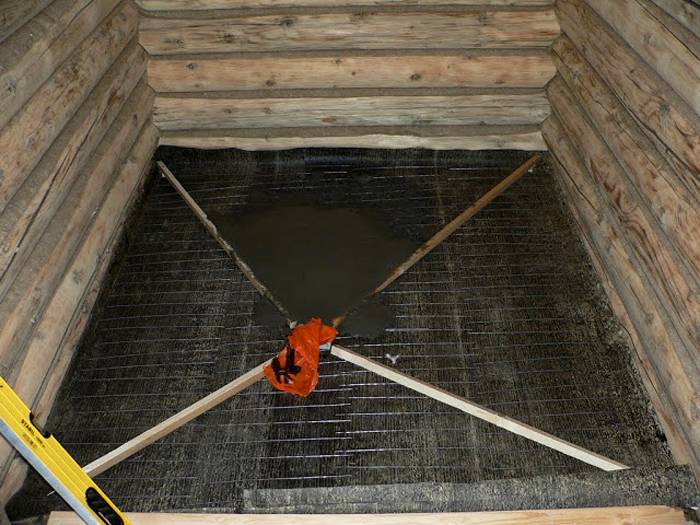
- Next, pour the concrete mortar, which should be less than 4 cm, that is, it should end up to the flange. If you do not carry out thermal insulation, then much more concrete will be required.
- Craft a flange gasket to create a . In this case, the diameter of the product should be made larger than that of the parts.
- Fasten the top of the flange. It is not difficult, it is enough to lay on the top of the waterproofing and fix the component.
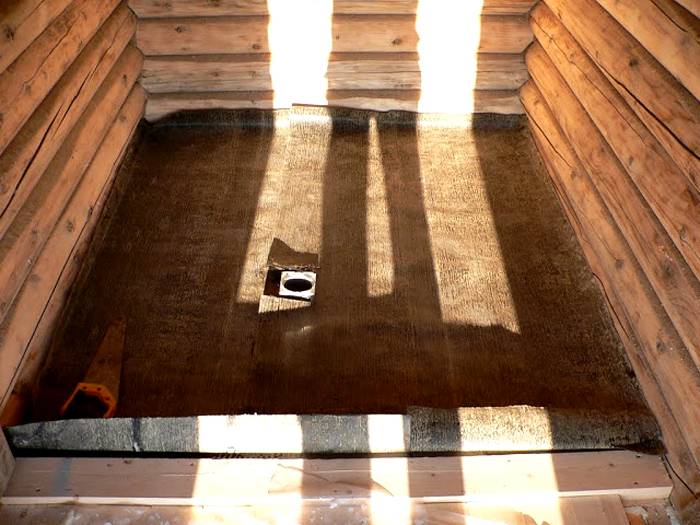
- Use a waterproofing film to protect the screed from breaking.
- Mount the siphon.
- Next, we move on to the rails, which are preferably made of plastic, since they are not affected by humidity. They will ensure the correct pouring of concrete.