How to make a shower drain
There is a drain in the shower floor
Your attention is offered a full range of works on the device floor drain in the shower room: connecting the drain itself to the sewer riser, thermal insulation, waterproofing, concrete screed with a slope towards the drain and laying ceramic tiles. The drain ladder is mounted in the same way in the pool. The only difference is that the pool requires a special type of waterproofing, which is applied to the walls and bottom.
Floor drain- a rather complex plumbing device. Its design, in addition to draining water into the sewer riser, provides other functions:
- sealed joint with the floor;
- filtration of waste water from large impurities, preventing the formation of frequent blockages in the sewage system;
- the possibility of cleaning the drain system (revision);
- a water seal that prevents stale air from the sewer from entering the room.
Floor drains are made of corrosion-resistant metal, durable plastic or combined (metal-plastic). Their design must be durable, strong and not compromise the tightness of the floor. First of all, this concerns the outer funnel casing, concreted in the floor and glued into a waterproof membrane. They can be with one drain pipe or straight-through (cut into an existing drain or when there are several drains on one drain) and have different heights. By the way, ladder height- a fundamental factor: it determines the minimum height to which the floor level in the shower room has to be raised.
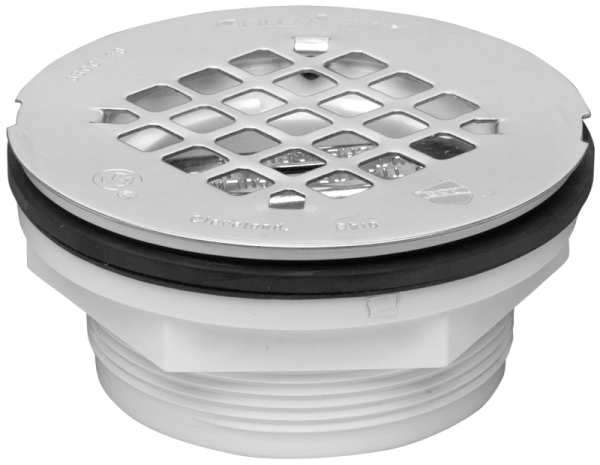
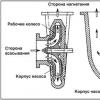
Siphon with filter for shower drain
The drain is a body (water intake funnel) with a flange for hermetic fixation of the waterproofing floor membrane. A siphon with a grate (included in the kit) is installed in the body, creating a water seal and protecting the sewage system from frequent blockages. The grill remains removable even when the ladder is in use. In the lower part of the body there are one or two outlets with a coupling for connecting it to the drains into the sewage system.
But before buying a drain, make sure that it suits you (including in height) and does not have any defects (cracks, deformations, and all fasteners are intact and complete). Immediately complete with drain pipes and couplings of the appropriate diameter and necessary for inserting the drain and sewer. Make a trial build.
Installation of a drain
The installation of a drain is inevitably associated with a significant rise in the floor in the shower or other room. Moreover, the floor is sloped to direct all the water towards the drain. As a rule, the rise is at least 15 cm, but for a shower room this is not scary even with a low ceiling.
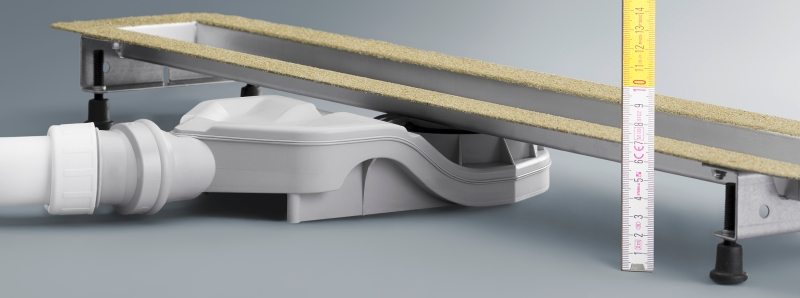
Viega small floor drain
The construction of such a floor is a multi-layer system:
- heat and sound insulation made of polystyrene foam - 5 cm;
- rough concrete screed - 4 cm;
- sealed membrane made of floating waterproofing material;
- 2nd concrete screed, which sets the slope towards the ladder - about 4 cm;
- ceramic tiles that do not absorb water and laid on an adhesive solution.
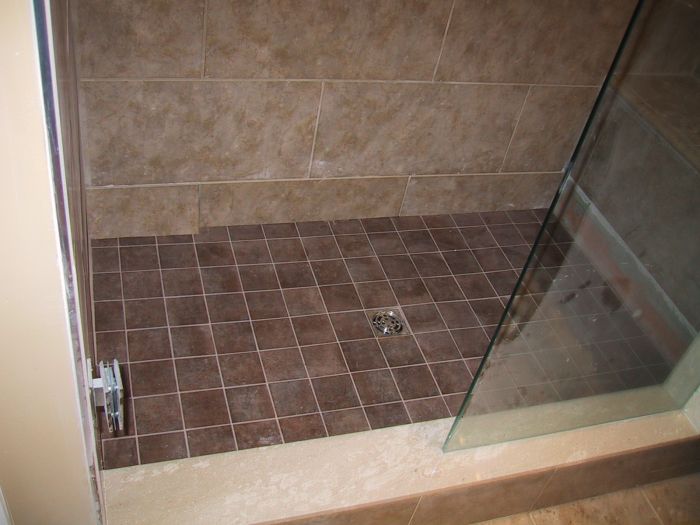
Thus, the drain with a drain turns out to be monolithically walled up in the floor (its grating should not protrude above the adjacent tiles).
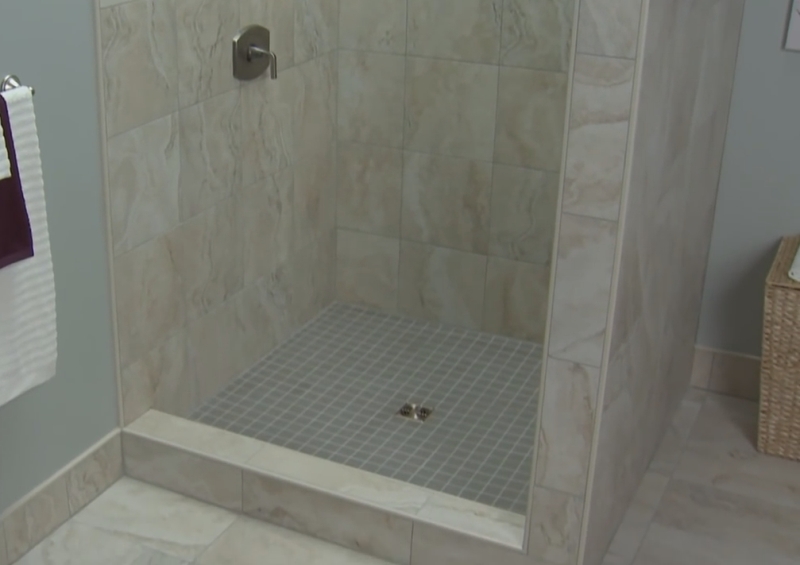
Requirements for floor with ladder: the grill should not protrude above the tiles, the joints between the tiles should be no more than 2 - 3 mm and be sealed with waterproof grout
We will consider the most difficult option, when the concrete base lies on cold ground. And this will require effective thermal insulation and not only because of the cold floor: low soil temperatures and hot water create strong temperature fluctuations in concrete screeds, which causes deformation processes in them, leading to mechanical destruction. On a warm concrete base, thermal insulation can be abandoned, and the missing floor thickness (relative to the height of the ladder) can be compensated for with the first concrete screed.
A four-centimeter concrete screed on top of expanded polystyrene is already strong enough and capable of evenly redistributing mechanical loads acting on it. With this thickness, you can use a conventional cement-sand mortar (1: 3), mixed with water, which reduces costs.
As thermal insulation, we use sheets of granular polystyrene foam (foam) with a density of 35 kg / m³. If the concrete base gets wet (high groundwater), it is better to use extruded polystyrene foam.
To create a waterproof and durable membrane in the floor, a domestic floating waterproofing sheet "isoplast" (without mineral sprinkling), used for soft roofs, was taken. The material is plastic, resilient and resistant to mechanical stress (fiberglass reinforced). Squeezed into the flange of the drain, it will serve as a good airtight seal. And its overlapping joints, heated by the burner until they soften, are firmly and hermetically glued. Pressed in a softened state, the material adheres firmly to the wall, which is especially important when installing a waterproof membrane. Its edges should be located on the shower room walls up to the height of the 2nd concrete screed and have a perfect abutment.
When installing concrete screeds, it is impossible to do without guides, along which the cement mortar is usually dispersed. To do this, you can use wooden slats of the appropriate size, but they have to be removed from the screed. If the guides can be made from a plastic that has plasticity, they can be left in the concrete: they will serve as expansion joints.
Increased requirements are always imposed on the drain in the shower floor or the bottom of the pool: tightness, strength, hygiene and durability, combined with an aesthetic appearance. All this is ensured by the design of the drain itself and its integration into the floor. When embedding a ladder, very specific building materials are used and a strict sequence of their laying on the base is observed.
The ceramic floor tiles used here are very demanding. The tiles must not absorb water. This indicator should not exceed 1.5% of its own weight (for ordinary tiles - about 11%). The surface of the tiles must be rough to avoid dangerous slipping of the feet on wet floors. By the way, ordinary adhesive mixtures are not suitable for such a tile: a special contact adhesive is required, which creates a strong and durable adhesion to the tile. Seams between the tiles are sealed only with waterproof grout.
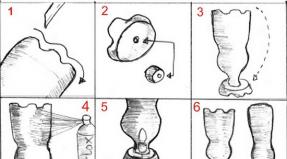
A short video will clearly demonstrate the basic structure and installation sequence of the drain in the shower:
A step-by-step guide to making a drain
Since the whole process of installing a drain in the shower room is illustrated in detail by us, we will dwell only on the points that require clarification and explanation.
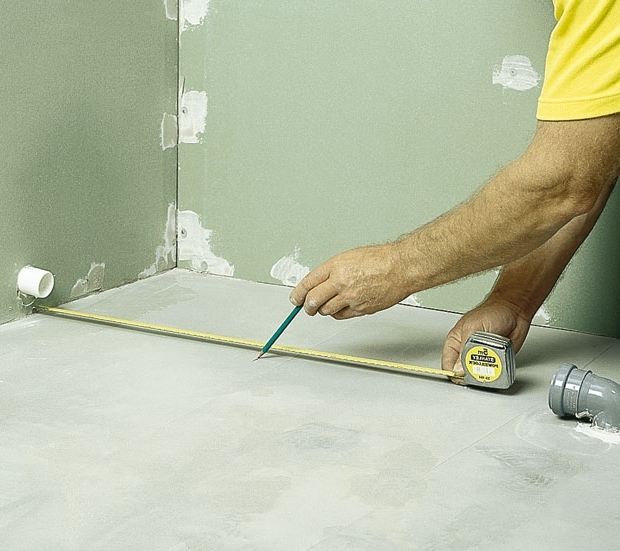
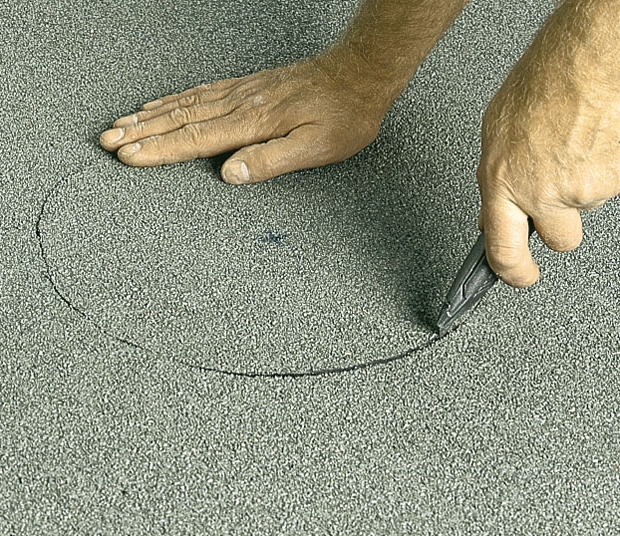
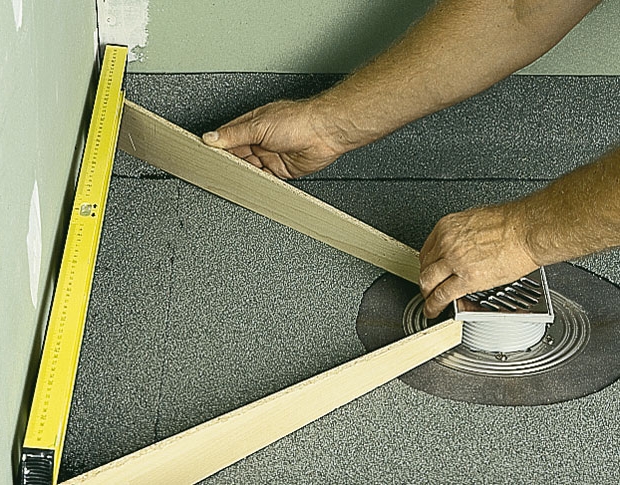
Immediately, we emphasize the role of the correct location of the drain. Before starting work, it is necessary to determine the thickness of each layer of the future floor. The lowest point of the sloped floor is largely determined by the height of the ladder: by changing the thickness of the concrete screeds, you will select the heights you need, but the ladder should never protrude above the tiles. The minimum slope of the drain is 1 cm / m. If you do less, then the water will not have time to drain.
The distance of the ladder from the walls should be a multiple of the size of your tile. In this case, it is necessary to take into account the thickness of the seam between the tiles (no more than 2 mm). Having determined the position of the ladder, taking into account the above, you will significantly reduce the number of tiles to be cut and get a more beautiful floor: only whole tiles are placed from the ladder to the wall, which are trimmed only along the breaks in the floor. When choosing a ladder, give up the round grate, it will require complex pruning or several tiles. In general, there should be a minimum of cut tiles on the floor.
It is better to start laying the tiles from the ladder to the walls: if you are mistaken in the dimensions, the trimmed tiles will be against the wall and will be less noticeable.
All corner joints of walls and floors are problem areas, where movements and stresses always arise, even if they are insignificant. But even this may be enough to damage the waterproofing. Do not consider us reinsurers and glue all such corners with special wide sealing tape.
When finishing the floor (bottom) and walls of the shower room (pool), you have to use ceramic tiles that do not absorb water and a special adhesive solution on which they are laid. But even in this case, when laying tiles on the floor and walls, we advise you to follow the following sequence: the floor is covered first, then the walls. This sequence creates more reliable protection against water penetration under the tiles at critical junctions of various structures.
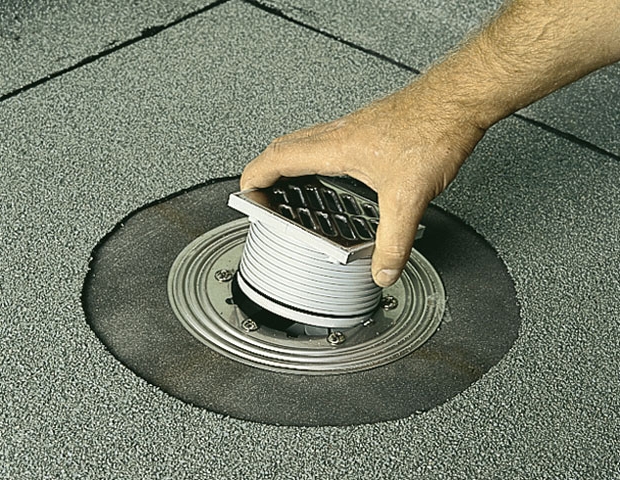
 | 1. The position of the drain relative to the walls is determined in a straight line to the place of the tie-in into the existing sewage system and so that it is a multiple of the size of the selected ceramic tile |
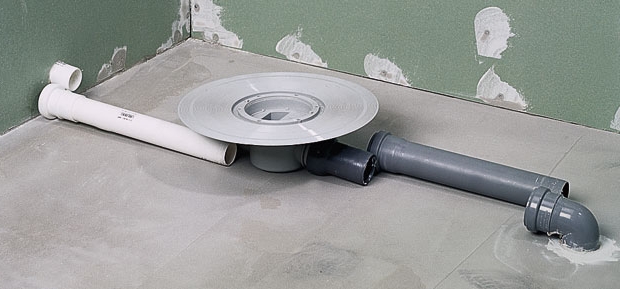 | 2. The ladder through the drain is connected to the sewer. All connections are sealed with silicone sealant. A walk-through ladder is used here: through it there is a drain from another room |
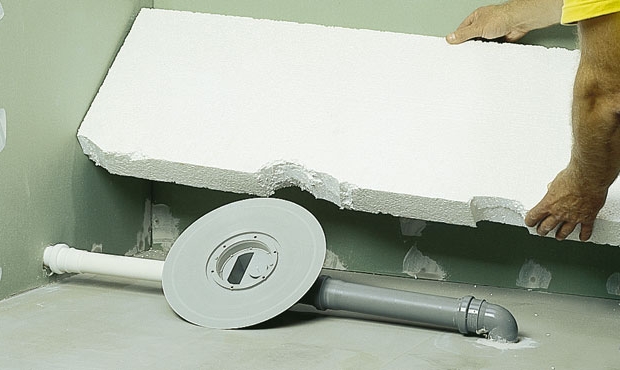 | 3. For heat and sound insulation on a concrete base, lay, with a cut for the assembled drainage system, sheets of expanded polystyrene: thickness 5 cm, density 35 kg / m³ |
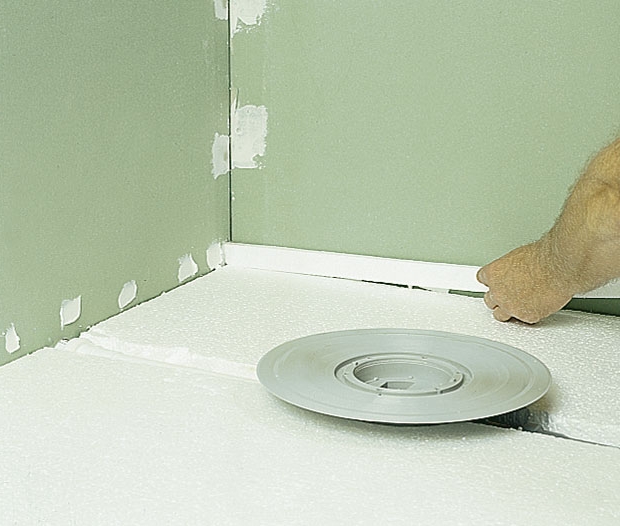 | 4. Slats made of plastic at the walls, when pouring the 1st layer of concrete screed, work as guides for leveling the mortar, and later - as expansion joints |
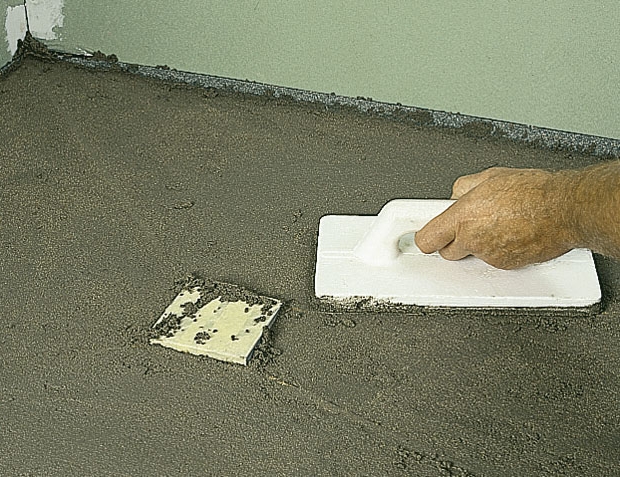
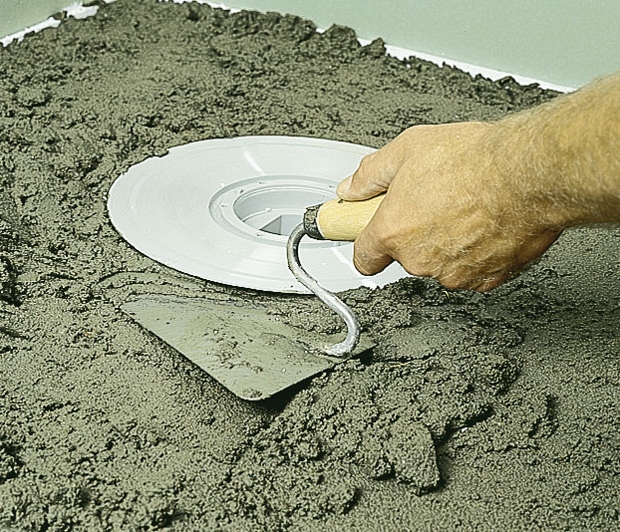 | 5. Cement-sand mortar is laid on top of expanded polystyrene and carefully compacted. It is important that the solution completely fills all voids around the body of the drain and under the flange. |
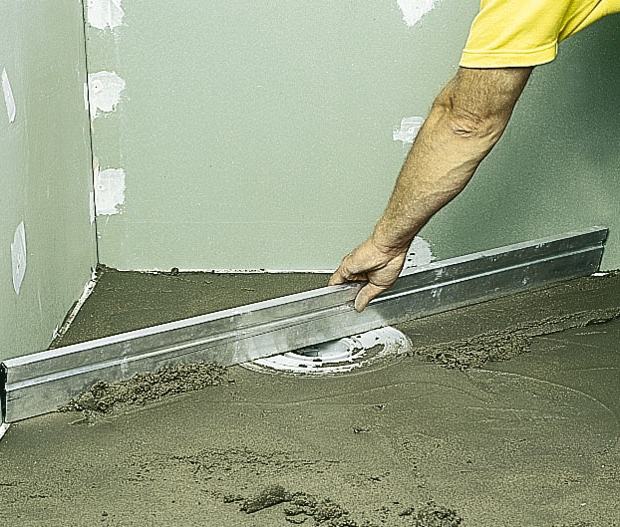 | 6. The flange of the ladder and the guides must be installed at the same level, under which the concrete screed is brought out. The screed surface is leveled with a special rule. |
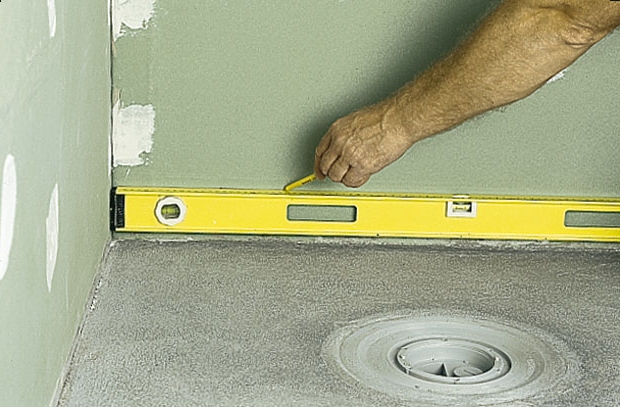 | 7. The upper level of the sloped floor starts from the walls. It is marked taking into account the thicknesses of the following layers: waterproofing, 2nd concrete screed, tiles and a slope to the ladder - at least 1 cm / m |
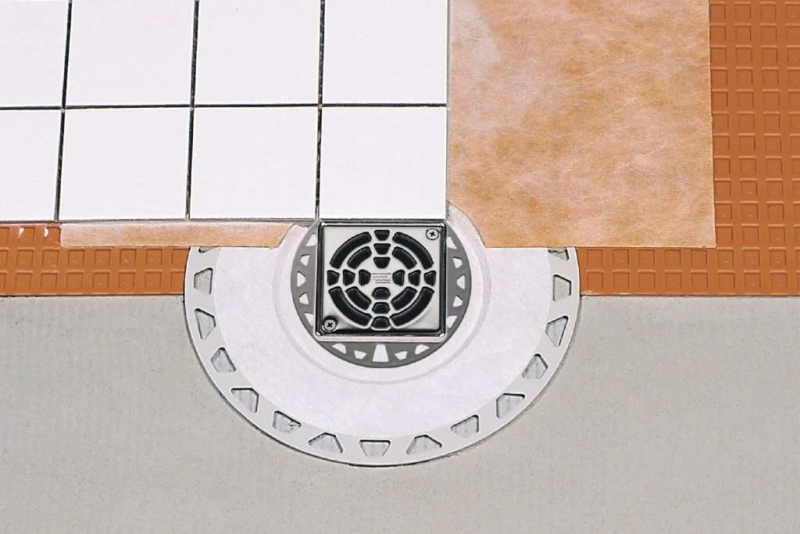
 | 8. A gasket for the flange is cut out of isoplast material: in the form of a square, significantly protruding beyond the flange, and with a hole along the inner diameter of the flange |
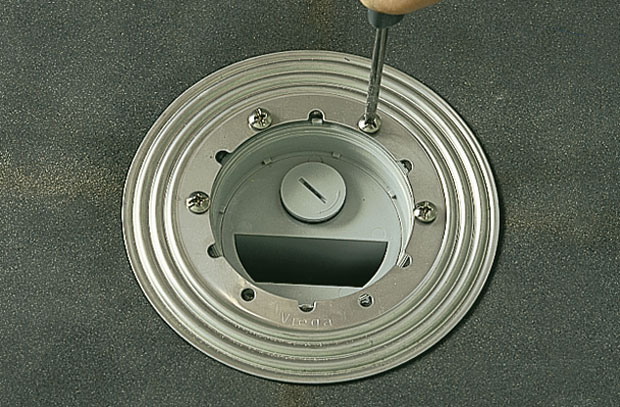 | 9. The counterpart of the flange, screwed to the body of the drain, seals the gasket hermetically. The screws are screwed in evenly around the entire perimeter, without pressing the gasket |
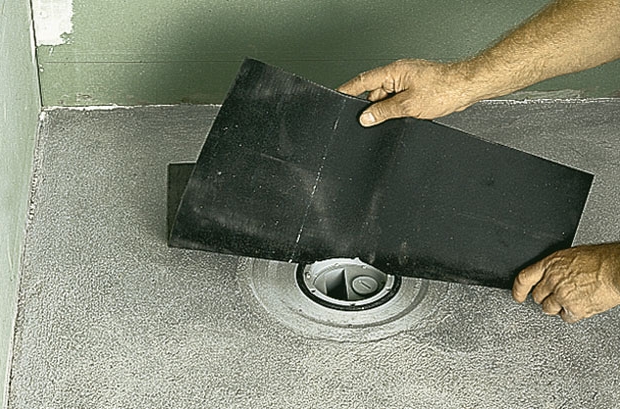
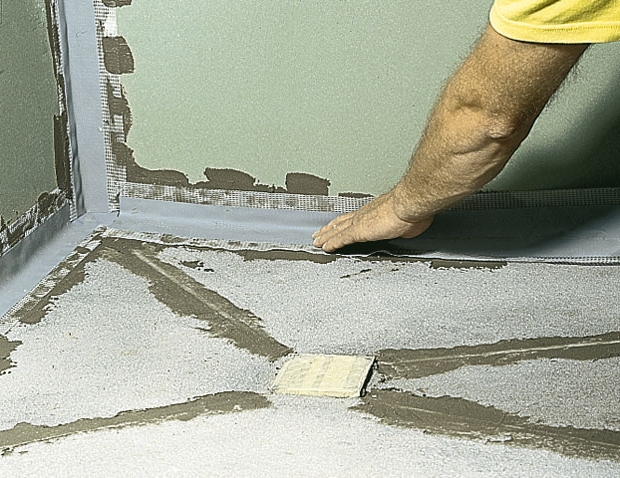
 | 10. Before laying the waterproofing, a hole is cut in it, corresponding to the position of the ladder and is larger in diameter than the flange. It should be overlapped with a laid gasket |
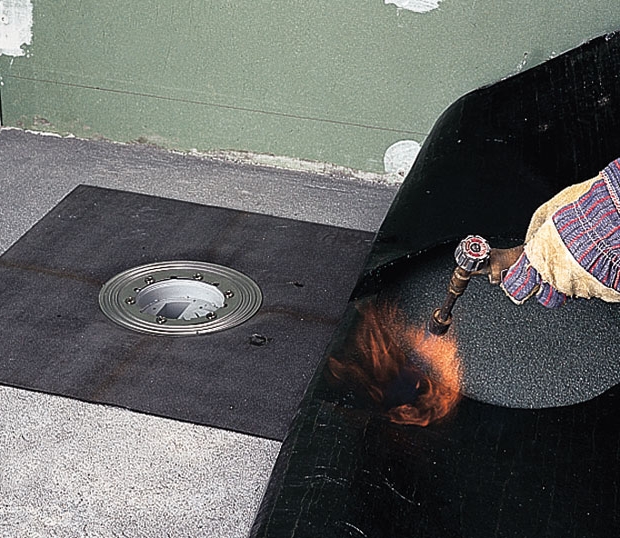 | 11. The deposited waterproofing material ensures the perfect tightness of the membrane: the overlapping places are heated until softened and squeezed together |
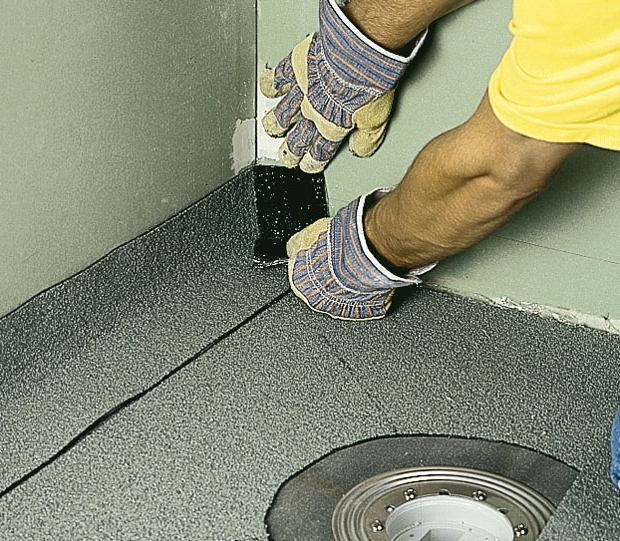 | 12. Particularly carefully waterproof the junction of the wall - the floor. First, in each corner, inserts are fused overlapping the walls and floor, and then - stripes overlapping the wall and floor |
 | 13. The siphon with a grate is precisely installed in the body of the drain. An O-ring makes their connection tight. During operation, only the grille remains removable |
 | 14. For pouring an inclined screed, four guides are placed, which are beveled at an angle corresponding to the slope of the floor, and their width at the siphon is less than its height by the thickness of the ceramic tile. |
| 15. The cement-sand mortar is laid, protecting the grating. It is carefully rammed and aligned along the guides with a rail, which, moving to the siphon, has to be shortened | |
 | 16. The hardening solution is moistened and rubbed, leveling. If the guides are made of elastic and non-decaying material, they are left as expansion joints |
 | 17. Corner joints are glued with a special sealing waterproofing tape (Knauf, IVSIL, Litokol, etc.), and the grooves from the remote guides are sealed with a cement-based repair mortar. |
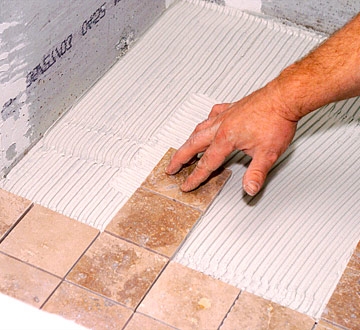 | 18. The tiles are started from the ladder. Trimming tiles requires precision and accuracy. Depending on the configuration of the drain, even circular tile trimming may be required. The distance of the ladder from the walls is a multiple of the tile size, and the rectangular shape of its lattice simplifies tile trimming. Then the edge of the tile adjacent to the grate does not need to be trimmed. |
Relatively recently, more modern solutions have appeared on the market that simplify the manufacture of such drains. For example, now it is easier to buy ready-made sets of perforated metal-plastic for the manufacture of a drain.