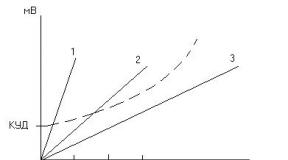
Parallel connection of compressors. Pressure switch for a compressor: independent connection and configuration. Installing a pressure switch
Let's imagine that the pipes of two injection compressors are installed in parallel (Fig. 21.10). In this case, compressor C1 is running, and C2 is stopped. According to this scheme, part of the oil pumped by C1 accumulates in the compressor head C2, where the refrigerant enters and condenses. During a long stop of C2, the temperature of its head is equal to the temperature environment.
If the discharge valve C2 is leaking, due to the pressure difference in it, part of the liquid (item 1) enters the cavity of the C2 cylinder and a high probability of water hammer occurs during startup. To prevent this phenomenon, it is necessary to connect the discharge pipes of two parallel mounted compressors according to the indicated diagram (Fig. 21.11).
In some cases, the installation is carried out with a lyre-shaped compensator (Fig. 21.12) running along the ground. This compensator (item 1) is located in close proximity to the compressors and its temperature is equal to the ambient temperature. It is a liquid trap that works equally for both oil and liquid refrigerant, and also allows you to reduce vibrations and compensate for thermal deformations of pipes. Special attention should be paid to leveling the oil level (item 2).

If the connection methods we have considered almost completely eliminate the accumulation of oil in the head of a stopped compressor, then they do not exclude the entry of refrigerant vapors into it. For greater confidence, check valves are installed on the discharge pipes of these compresses. But this method has its own Negative consequences, and in order to achieve the desired result, some safety measures must be taken.
The installed check valves must have the lowest hydraulic resistance, since by increasing the pressure loss on the discharge line, they will cause an increase in the temperature of the discharge vapors, and therefore a decrease in cooling capacity. The check valve must be installed with extreme care and attention. If a small foreign particle (a drop of solder, copper shavings...) gets under the check valve seat, it will disrupt its tightness and performance.
Another characteristic of check valves is the ability to “pop” as a result of pulsating discharge pressure or due to close installation relative to the discharge pipe, which can lead to their rapid destruction as a result. Based on this, the check valve on the discharge line is installed away from the compressor (preferably after the muffler) for greater efficiency. This makes it possible to retain foreign particles and reduce pressure pulsations.
The muffler must be installed in such a way that the oil can circulate freely. For this purpose, the word “Tor” (Up) is engraved on its outer surface. When installing a check valve and muffler, it is also necessary to take into account the direction of the fluid and follow the developer’s instructions (Fig. 21.13).

Valve failure due to water hammer is classified as a “too weak compressor” type fault.
Air hose designed to connect the compressor with a paint sprayer and water-oil separating filters. There are several types of air hoses, differing in material of manufacture and connection diagram. In order to choose a name that suits you, you must have certain knowledge of their properties and design features.
The most common compressor hoses used in garage painting are:
- reinforced rubber;
- reinforced plastic.
 Technically and morally obsolete twisted hoses for compressors, which can still be found in the garages of many home craftsmen, are in no way recommended to be used. This is due, first of all, to their small cross-section, amounting to only 5-6 mm. In addition, old hoses are very unreliable and can break at the most inopportune moment, completely blocking air access to the spray gun. As a result, further coloring becomes impossible. That is why it is necessary to make a choice exclusively in favor of modern products. Let's look at its main advantages and disadvantages.
Rubber-reinforced hose durable, wear-resistant, suitable for use with oxygen cylinders. Its only drawback can be considered only its relatively large weight.
Plastic-reinforced hose costs less than rubber-reinforced ones, weighs slightly less. Its main disadvantage is its high sensitivity to changes in ambient temperature. Thus, at low temperatures this hose hardens excessively, and at high temperatures it softens. As a result, its service life is reduced. Plastic-reinforced hoses are especially poorly resistant to direct sunlight, as a result of which their strength is reduced several times.
There are 2 types of practical and quick-release connectors designed to connect air hoses to compressors, moisture-oil filters and spray guns - fittings And fitting. They are inserted into each other according to the “fitting into fitting” scheme. In this case, hoses and a water-oil separating filter are equipped with a fitting, and a paint sprayer is equipped with a fitting.


If you purchased a moisture-oil separating filter without a fitting, you must select an inlet/outlet fitting for it that has an external thread for connection.
The hose connectors are secured using special clamp elements. When choosing these fasteners, you should not pay attention to the features of their design and appearance: The most important thing is that the connection does not “poison” the air.
Please explain why KT-602-1 describes the simplest parallel connection of the crankcases of two compressors with a tube to equalize the oil level without using an oil level regulator, and nothing is said about equalizing the gas pressure, i.e. a tube is supposed to be mounted above the oil level and connects two compressors while equalizing the gas pressure. And please answer how reliable will be the control of sequential operation of compressors without “logic” by means of RD, i.e. one of the compressors will always turn on first and, accordingly, work more. Thank you!
07 07 2012 // Nail Alekperov
Answer:
Are you sure that you saw this diagram exactly in? These instructions are for parallel connection of OCTAGON series compressors. For them, connecting the crankcases with any tubes is not at all desirable.
By the way, this manual has already been updated to KT-602-2 Parallel compounding of OCTAGON compressors.
Please send me a diagram that interests you. Let's discuss.
It is necessary to connect two 4DC-5.2 compressors in one unit for the minus chamber (R404a) consumer one point (evaporator). The customer does not want to equip the compressor with oil level regulators and other additional features. lotions (it’s still a bug), what to do and how to get out of this situation, thank you in advance
09 07 2012 // Nail Alekperov
Answer:
The most appropriate solution for your installation is the 44DC-10.2 tandem, or an already assembled unit based on the LH124/44DC-10.2 tandem
If your installation has a small length of pipes, there are all the necessary slopes and oil lifting loops, the evaporator is defrosted regularly, then, even if two 4DC-5.2 are connected in parallel, there is no need to install either an oil separator, or an oil level control system in the crankcases, or any other equalization tubes connecting the compressor crankcases. You just need to make a symmetrical suction manifold, see instructions.
Re(1): Parallel connection
Forgive me for being intrusive, but what to do if one of the compressors is down? Do you think that with the correct symmetry of the manifold, etc., I can avoid oil carryover from an inoperative compressor? The length of the pipeline is only 4 meters, the controller has an auto defrost function, it was supposed to install an oil separator on the discharge and a liquid separator on the suction, the sequential switching on of the compressors is regulated by the RD, the fans on the condenser are also turned on and off by the RD. Thank you
09 07 2012 // Nail Alekperov
Answer:
Yes, both in tandem and in parallel connection, with the correct symmetry of the collector, when one of the compressors is idle, oil does not carry over from it - where?
If the evaporator is selected correctly, i.e. its performance corresponds to that of the compressor if regular evaporator defrosts are carried out, i.e. its complete freezing is not allowed; if a expansion valve with an MOP or EEV point is used, with overheating control in all operating modes, then the compressors will not be filled with liquid refrigerant, i.e. There is no need to install a liquid suction accumulator.
Oil circulates through the system - there is nothing wrong with that. In your installation there is a short and unbranched circuit, i.e. the oil cannot lie somewhere. Why then spend money on an oil separator, an oil receiver and a system for regulating oil levels in compressor crankcases?
Re(3): Parallel connection
On your advice, the guys and I assembled a unit of two Bitzer 7.2 compressors without oil level regulators, but the oil still goes somewhere, especially from the first compressor, the suction pressure is high 2.5, we can’t reach the temperature regime, it seems to me that the evaporator is flooded with oil?! I am attaching a photo Help please!
07/18/2012 // Nail Alekperov
Answer:
Thanks for your photo

Your suction manifold looks nice. And the pumping turned out to be scary!
For an example of the correct location of the discharge pipes, see the photo and the answer to the question
Connecting a magnetic starter and its small-sized variants is not difficult for experienced electricians, but for beginners it may be a task that requires some thought.
A magnetic starter is a switching device for remote control high power load.
In practice, often, the main application of contactors and magnetic starters is the starting and stopping of asynchronous electric motors, their control and reversal of engine speed.
But such devices also find their use in working with other loads, such as compressors, pumps, heating and lighting devices.
For special safety requirements (high humidity in the room), it is possible to use a starter with a 24 (12) volt coil. And the supply voltage of electrical equipment can be high, for example 380 volts and high current.
In addition to the immediate task of switching and controlling loads with high current, another important feature is the ability to automatically “turn off” the equipment when there is a “loss” of electricity.
A good example. While some machine, such as a sawing machine, was operating, the voltage in the network was lost. The engine stopped. The worker climbed to the working part of the machine, and then the tension appeared again. If the machine was controlled simply by a switch, the engine would immediately turn on, resulting in injury. When controlling the machine's electric motor using a magnetic starter, the machine will not turn on until the "Start" button is pressed.
Magnetic starter connection diagrams
Standard scheme. It is used in cases where it is necessary to carry out normal starting of an electric motor. The "Start" button was pressed - the engine turned on, the "Stop" button was pressed - the engine turned off. Instead of a motor, there can be any load connected to the contacts, for example a powerful heater.

In this circuit, the power section is powered by a three-phase alternating voltage of 380V with phases “A” “B” “C”. In cases single phase voltage, only two terminals are used.
The power part includes: three-pole circuit breaker QF1, three pairs of power contacts of the magnetic starter 1L1-2T1, 3L2-4T2, 5L3-6T3 and a three-phase asynchronous electric motor M.
The control circuit receives power from phase “A”.
The control circuit diagram includes the SB1 “Stop” button, the SB2 “Start” button, the magnetic starter coil KM1 and its auxiliary contact 13NO-14NO, connected in parallel to the “Start” button.
When the QF1 machine is turned on, phases “A”, “B”, “C” go to the upper contacts of the magnetic starter 1L1, 3L2, 5L3 and are on duty there. Phase “A”, which supplies the control circuits, comes through the “Stop” button to the “3” contact of the “Start” button, the auxiliary contact of the starter 13NO and also remains on duty on these two contacts.
note. Depending on the voltage rating of the coil itself and the supply voltage used, there will be a different coil connection diagram.
For example, if the coil of a magnetic starter is 220 volts, one of its terminals is connected to the neutral, and the other, through buttons, to one of the phases.
If the coil rating is 380 volts, one output is to one of the phases, and the second, through a chain of buttons, to the other phase.
There are also 12, 24, 36, 42, 110 volt coils, so before you apply voltage to the coil, you must know exactly its rated operating voltage.
When you press the “Start” button, phase “A” hits the coil of the KM1 starter, the starter is triggered and all its contacts are closed. Voltage appears at the lower power contacts 2T1, 4T2, 6T3 and from them goes to the electric motor. The engine starts to rotate.
You can release the “Start” button and the engine will not turn off, since self-retaining is implemented using the auxiliary contact of the starter 13NO-14NO, connected in parallel to the “Start” button.
It turns out that after releasing the “Start” button, the phase continues to flow to the coil of the magnetic starter, but through its 13NO-14NO pair.
If there is no self-retaining, it will be necessary to keep the “Start” button pressed all the time so that the electric motor or other load runs.

To turn off the electric motor or other load, just press the “Stop” button: the circuit will break and the control voltage will stop flowing to the starter coil, the return spring will return the core with the power contacts to its original position, the power contacts will open and disconnect the electric motor from the mains voltage.
What does the installation (practical) diagram for connecting a magnetic starter look like?

In order not to pull an extra wire to the “Start” button, you can place a jumper between the coil output and one of the nearest auxiliary contacts, in in this case these are “A2” and “14NO”. And from the opposite auxiliary contact the wire runs directly to the “3” contact of the “Start” button.

How to connect a magnetic starter in a single-phase network

Electric motor connection diagram with thermal relay and circuit breaker

How to choose a circuit breaker (circuit breaker) to protect the circuit?
First of all, we choose how many “poles”, in three-phase circuit Naturally, a three-pole circuit breaker will be needed for power supply, and in a 220 volt network, as a rule, a two-pole circuit breaker will be sufficient, although a single-pole circuit breaker will be sufficient.
The next important parameter will be the operating current.
For example, if the electric motor is 1.5 kW. then its maximum operating current is 3A (real operating current may be less, it must be measured). This means that the three-pole circuit breaker must be set to 3 or 4A.
But we know that the starting current of the engine is much higher than the operating current, which means that a regular (household) automatic machine with a current of 3A will operate immediately when starting such an engine.
The characteristic of the thermal release must be selected D so that the machine does not trip when starting.
Or, if such a machine is not easy to find, you can select the current of the machine so that it is 10-20% greater than the operating current of the electric motor.
You can also go into a practical experiment and use a clamp meter to measure the starting and operating current of a particular motor.
For example, for a 4kW motor, you can install a 10A automatic.
To protect against motor overload, when the current increases above the set value (for example, phase loss), the contacts of the thermal relay RT1 open and the power circuit of the electromagnetic starter coil is broken.
In this case, the thermal relay acts as a “Stop” button, and is in the same circuit, in series. Where to put it is not particularly important, it can be in the section of the L1 - 1 circuit, if it is convenient for installation.
With the use of a thermal release, there is no need to so carefully select the current of the input circuit breaker, since the thermal protection of the motor should be quite adequate.
Connecting an electric motor via a reversing starter
This need arises when it is necessary for the engine to rotate alternately in both directions.

Changing the direction of rotation is implemented in a simple way; any two phases are swapped.
Piston compressors are used wherever a stationary or mobile source of compressed air is needed. The relay turns off the compressor motor when the pressure in the reservoir reaches a set value, and starts it again if the pressure in the receiver drops below the permissible value. It also releases excess air into the atmosphere.
Principle of operation
The operating principle of the automation unit is simple. The device is mounted on a pipe communicating with the receiver. The spring-diaphragm pressure switch sensor for the compressor continuously measures the pressure. As soon as it drops below the set value, the sensor rod, under the action of a spring, closes the contacts of the compressor relay and the electric motor is connected, pumping air into the tank. After reaching the set pressure, it presses the rod and opens the contacts, turning off the engine. Adjustment of these values is available to the user.
In addition, when the operating pressure limit is reached, the safety valve included in the device is activated, releasing excess air from the compressor into the atmosphere.
Device
All components of the pressure switch for the compressor are assembled in a compact unit, covered with a plastic or metal case. The product includes:
- Inlet and outlet pipes.
- The sensitive element is a spring and a membrane.
- Stock. Connected to the membrane and placed inside the spring coils.
- Contact Group.
- Adjustment screws.
- Unloading and safety valve.
- Mechanical switch.
The elasticity of the spring, and, consequently, the sensitivity of the sensor, depends on the ambient temperature; most devices are designed to operate in the temperature range from -5 to +70 °C.
The unloading unit is designed to release air from the compressor cylinders after it stops. Thereby:
- its subsequent launch is facilitated;
- wear of piston group parts is reduced;
- the service life of the entire unit is extended.
When the unloading valve is activated in the silence that follows after the compressor stops, a sharp characteristic sound is clearly audible.
The mechanical switch serves for the initial start and final stop of the compressor. It has two positions: “On” and “Off”. “On” activates automatic operation systems. It transfers further control of the compressor to the pressure switch. The “Disabled” position prevents spontaneous starting of the motor when the pressure in the receiver drops below the set value.
The safety valve allows you to release excess pressure into the atmosphere in the event of a relay failure and avoid compressor breakdown in this case.
A thermal relay can serve as additional protection for the compressor motor. It is included in the automation unit; it disconnects the motor windings from the supply voltage in the event of an increase in current strength, indicating an overload of the motor.
Setting up an air compressor comes down to setting the operating pressure with an adjusting screw. The pressure regulator has values marked on it. Pressure can be controlled more accurately using a pressure gauge.
Types of pressure switch devices
There are two main versions of the device available. The pneumatic-mechanical part is identical; the difference is determined by the method of closing the contacts when the rod moves:
- Normally closed (NC). used for direct control of low and medium power motor circuits.
- Normally open (NO). The movement of the rod closes the contacts when the maximum pressure is reached. The reverse movement opens them as it decreases. The contacts are used to control a more powerful relay that starts and stops the electric motor. The circuit turns out to be more complex, but the load on the pressure switch contacts is reduced and the service life increases.
When replacing a relay, you need to carefully check that its type matches electrical diagram compressor. his type.
Installation of relays and auxiliary elements
In addition to basic components, devices are often equipped with additional devices that increase ease of use or expand the functionality of the device.
They are installed on flange connections, most often 1/4”
The pressure switch is connected to the compressor as follows:
- Screw the inlet pipe to the tank pipe.
- Connect a pressure gauge, unloading and safety valves to the flanges of the device.
- Close unused holes with plugs.
- Connect the electrical connector of the relay to the electric motor.
Low-power electric motors are connected directly; more powerful ones will require the use of a starter. The design of the pressure switch must match the engine power.
Adjustment and commissioning process
The device is configured and adjusted at the manufacturer's factory. Typical values are 2.8 atm. for the upper limit and 1.4 for the lower limit. However, sometimes situations arise in which it is necessary to adjust the device yourself:
- Setting up after partial or complete repair.
- Specific requirements of consumer devices.
- Installing a relay that was not originally designed to work with this compressor.
Before you begin adjustment, you should carefully study the parameters of all mating devices according to their data sheets. Passport data must correspond to the numbers embossed or engraved on a plate attached to the body of the unit.
The main indicator is the maximum pressure for which the compressor is designed. The value at which the pressure switch will operate should be 0.4-0.5 atm less than this maximum. In real operating conditions of the device, taking into account voltage instability, losses in seals, and the degree of wear of the piston group, this pressure may not be achieved. Then the pressure switch will not turn off the motor, the compressor will work continuously, overheat and wear out.
Having decided on the parameter values, you can begin making adjustments. To do this you need:
- Remove the casing.
- Two nuts will become available - a larger one and a smaller one. These are the regulatory bodies. Arrows are engraved on the body nearby, showing the direction of rotation to increase and decrease the parameter, respectively.
- The large nut sets the value at which the electric motor turns off. When rotated clockwise, the value increases, in the opposite direction it decreases. It is indicated by the P (Pressure) icon.
- The smaller nut sets the difference in engine start pressure compared to the shutdown value. It is designated ΔР.
Before you start setting up, you should fill the tank at least 2/3 full. The sequence of actions is as follows:
- Disconnect the unit from the network.
- Adjust the P and ΔP values by rotating the adjusting nuts.
- The set values should be monitored using a pressure gauge.
A number of manufacturers place adjustment controls on the outside of the device. This increases the convenience of adjustment, but at the same time increases the risk of changing the settings by accidental touch.
Possible malfunctions of the device
The device is characterized by its simple design and high reliability. However, they are also subject to malfunctions and breakdowns. A number of minor difficulties can be easily corrected with your own hands:
- Air leakage from the device when the pump is turned on. Identified by a characteristic whistle and the feeling of a sharp cold draft near the body. Most often the cause is a broken start valve. To repair, the gasket must be replaced.
- Frequent starting of the motor. The cause may be loose adjustment screws. It is necessary to carry out the procedure for adjusting the on and off threshold values using the pressure gauge and, if necessary, restore the passport values.
When serious problems experienced craftsmen recommend not to bother with repairs and subsequent adjustments, but to immediately replace the entire device.
Troubleshooting methods
More complex work will be required if the compressor does not turn on. This can happen if the relay contacts wear out and melt due to sparks occurring at the moment of interruption electric current. Two methods are possible:
- In case of slight wear of the contact groups, clean the areas with a file or sandpaper. Care must be taken not to bend the slats. This will extend the service life by several weeks.
- Replace the contact groups with new ones from the repair kit for this model.
To repair contact groups, the following operations should be performed:
- Bleed the air from the tank and disconnect the unit from the network.
- Remove the relay from the compressor.
- Remove the casing.
- Disconnect the wires going to the contacts.
- Using a screwdriver, pry the contact terminal out of the mount and carefully drill out the melted areas.
- The wire is replaced with copper wire of the appropriate cross-section. It should fit into the hole with minimal clearance. The wire is passed into the hole and pressed tightly with pliers.
- After repairing all melted contacts, reassemble the device in the reverse order.
It makes sense to spend time on such repairs only if branded spare parts are unavailable for replacement.
The connection diagram of the pressure switch depends on the type of electric motor. Single-phase ones are controlled by relays designed for 220 V with two contact groups. For three-phase electric motors, a 380 V device is installed, with three contact groups, each connecting its own phase. The use of single-phase switches for three-phase loads is unacceptable, since one of the phases remains permanently connected to the winding.
Flange connections
A number of manufacturers install additional flange connectors on their products. Most often there are two or three of them, the standard size is ¼ “. Through them, components such as a safety valve, pressure gauge, etc. are connected.
Installing a pressure switch
For installation, you must perform the following operations:
- Connect the relay to the receiver pipe.
- Connect the pressure gauge, safety and relief valves through the flange connectors.
- Place plugs in the remaining unoccupied connectors.
- Connect the wires from the engine to the electrical connector of the device.
- Make adjustments.
The last point should be considered in more detail.
Important! The adjustment is carried out with at least 2/3 of the tank filled and the power turned off.
The manufacturer supplies devices that have been tested and adjusted to standard values.
If the parameters of a given compressor or the characteristics of consumer devices require you to configure the relay to other values, you should do the following:
- Remove the device cover.
- Two wrench heads will become visible.
- The big one controls the shutdown pressure and is designated by the letter P (Pressure).
- The small one controls the pressure difference at which the motor turns on. It is designated by the letters ΔP.
- The arrows indicate the direction of rotation for increasing values (+) and decreasing values (-).
- Control the pressure using the pressure gauge and set the required values.