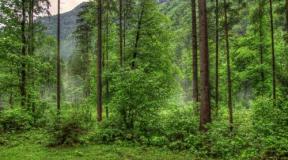
How to draw a forest. How to draw a forest with a pencil step by step. Drawing a pine forest
Nature in autumn is filled with so many colors that you just want to pick up a pencil or brush and capture this diversity on a sheet of paper. What should those who do not know how to do this do? Don't be upset. Today we will teach you about the autumn forest.
It's simple
Any person, even one who has never held a brush or pencil for this purpose, will certainly cope with the task. And if you follow our tips on how to draw an autumn forest, it will be quite simple. So, first you need to take a blank sheet of paper, a pencil, paints and brushes. Professionals also use an easel. We’ll simply put something solid under the paper and start creating beauty.
pencil step by step
Painting with paints is a little easier. Such a picture will be able to convey the entire play of color, the mood of the artist, even if he first took it in How to show the state of nature, the mood with a pencil? Using our tips, this will not be difficult to do.
Without pressing hard on the pencil, draw a horizon line. If our imagination sees a path in a future picture, it also needs to be shown.
Let's start depicting the trees. First of all, we draw those that are closer, then those that are further away. With barely noticeable strokes we show only the tops of the farthest ones. We draw the contours of large and small trunks.
And everything will work out
Under the trees we draw grass with thin strokes.

Next you need to draw the contours of the tree tops. To make the picture more accurate, you need to add shadows. It is not at all necessary to draw every branch. In some places, a kind of shadow is simply created, which can be partially shaded. While working, it is important to ensure that the shadow lies in one direction.
To define the sky, we do shading with a pencil. It is best done with a piece of paper, but not with your finger.
How to paint a forest in watercolor
The first step will be a sketch. Draw light outlines with a pencil. By pressing it, we can create a shadow.
Let's sketch the sky. We dilute ultramarine and apply it to the desired place on the sheet. To define the lower part of the clouds, apply diluted burnt umber with the addition of a small amount of carmine.
Like a forest, so that it is especially expressive? Attention is paid to the foreground of the picture. Using sharp movements we draw the grass. For it we use burnt umber with ocher, adding orange paint to this.
Next we draw the leaves. We select the color as our imagination tells us. The main thing is not to use one color, because we are painting an autumn forest. To convey the true mood of the painting, we will use a mixture of colors. With sharp movements we imitate the movement of leaves that sway in a strong wind.
To depict grass, it is also better to use a complex of paints. We add speakers to her too. While working, do not forget about the shadows from the trees.

In conclusion
The suggested tips will definitely tell everyone how to draw an autumn forest. And even novice artists will master the creative process.
→ Drawing a forest
What you will need
In order to draw a forest we may need:
- Paper. It is better to take medium-grain special paper: beginning artists will find it much more pleasant to draw on this kind of paper.
- Sharpened pencils. I advise you to take several degrees of hardness, each should be used for different purposes.
- Eraser.
- Stick for rubbing hatching. You can use plain paper rolled into a cone. It will be easy for her to rub the shading, turning it into a monotonous color.
- A little patience.
- Good mood.
Step by step lesson
True nature in all its beauty can only be revealed if you draw it from life. It will be much better to draw if you look directly at the forest. If this is not possible, then ordinary photographs, which are simply in abundance in search engines, can help out.
By the way, in addition to this lesson, I advise you to pay attention to the lesson “”. It will help improve your skill or just give you a little fun.
Tip: create a sketch with as thin strokes as possible. The thicker the sketch strokes are, the more difficult it will be to erase them later.
The first step, or rather the zero step, is always to mark a sheet of paper. This will let you know where exactly the drawing will be located. If you place the drawing on half of the sheet, you can use the other half for another drawing. Here is an example of marking a sheet in the center:
Step one. Let's start with a simple thing: draw a horizon line, and draw a path with two vertical lines.

Step two. On the sides of the invented path we draw tree trunks, large and small.

Step three. Let's draw the trunks higher and draw their bottoms with a pencil. We’ll also add some grass at the base of the trunks.

Sha is the fourth. Finally, let’s draw the tops with branches and add shadows.

Step five.

Step six.

Save the forest - use paper on both sides (just not in the toilet). But it's better to plant new plants.
So you learned how to draw a forest, I hope it was interesting and informative. Now you can pay attention to the lesson “” - it is just as interesting and exciting. Well, there are social network buttons for a reason =)
Hello, dear friends!
I am sure that almost all of you are interested in the topic of creating landscapes. Landscapes can be very different, showing beautiful and interesting views of different parts of our planet, in many of them you come into contact with the task of depicting trees. How to draw a tree that is alive, beautiful and natural is the topic of our lesson today.
Trees are not difficult to draw, but sometimes they come out too drawn or flat.
Basic mistakes
The main mistakes in drawing trees are:
Lack of volume
The lack of volume in a drawing (in color or black and white) is achieved by using paints of different tones and intensity. Even on a cloudy day, some part of the crown and trunk will be more shaded, and some less. The colors are always darker in the thick of the foliage. Think of a tree as a ball (crown) and a cylinder (trunk) to understand how shadows form on this complex shape.
The forest can be very different. For example, it could be a small forest in which it is difficult to get lost, or it could be a deep thicket. To better understand how to draw a forest, it is recommended to carefully consider the works of the greatest painters on this topic. For example, the paintings of Shishkin are very interesting, who was unusually good at conveying the atmosphere of a mysterious and enchanting forest in his wonderful works.
You can also draw a forest with a pencil from life. Such a walk, during which you can make a series of sketches from nature, will also be very beneficial for your health. After all, it’s no secret that the air in the forest is particularly clean and fresh. If it is impossible to go to some forest, then you can learn how to draw a forest using beautiful photographs.
Before you draw the forest step by step, you must make sure that all the accessories needed for this, which are listed just below, are nearby. So, to draw a forest you need: 
1). Multi-colored pencils;
2). Eraser;
3). Liner;
4). Paper;
5). Pencil.
Now you can learn how to draw a forest with a pencil step by step, and then color it:
1. First draw the horizon line;

2. Draw the outlines of the tree trunks that are located in the foreground;

3. The drawing will look more interesting if the trees are different. Therefore, draw the first tree, making it a Christmas tree;

4. Draw the second tree, which half hides the spruce. Let it be a birch;

5. Now draw more clearly the third tree, which is the largest. Let it be an oak tree;

6. In the background, draw the trunks of other trees, without detailing them too much;

7. Draw blades of grass and mushrooms in the foreground;

8. Outline the sketch with a liner;

9. Use an eraser to erase the preliminary pencil drawing;

10. Paint the trunks of those trees that are not birches with different shades of brown. Paint the cones on the spruce with a light brown tone;

11. Shade the birch trunks with light gray and gray pencils;

12. Blue-green color
Every 4 seconds, an area of forest equal to a standard football field is cut down around the world. This is statistics. The fastest rate of deforestation in Southeast Asia. The Chinese are multiplying, but they have nowhere to live. So what should I do? We need drawing paper! I want to tell you how to draw a forest with a pencil. This won't restore our fauna, but it's worth a try.
Forest Facts:
- Aokihara Forest, or Suicide Forest. The strange place deservedly received its name. It itself is so thick that light practically does not penetrate there, and compasses stop working. For some reason, this particular place in Japan has become a favorite place for those wishing to commit suicide (apparently, some do not have the courage to commit hara-kiri).
- In the Kaliningrad region there is a forest that local residents called Dancing, or Drunk. No, alcoholics and drug addicts do not gather there. The fact is that pine trees grow on 1 square kilometer, which, for a reason unknown to science, twisted their trunks strangely. Some were completely wrapped in knots. As if they were tormented by stomach pain.
- It is generally accepted that tropical forests are full of various sounds and noises. I will disappoint you - during the day the jungle is quieter than a sleeping child. The life of all animals there begins at night, and even then they behave very carefully and quietly.
Let's try to draw.
How to draw a forest with a pencil step by step
Step one. Let's start with a simple thing: draw a horizon line, and draw a path with two vertical lines.

Step two. On the sides of the invented path we draw tree trunks, large and small.

Step three. Let's draw the trunks higher and draw their bottoms with a pencil. We’ll also add some grass at the base of the trunks.

Sha is the fourth. Finally, let’s draw the tops with branches and add shadows.

Step five.